Perfectly julienned potatoes are a game-changer in the kitchen. Whether you're preparing crispy fries, elegant scalloped potatoes, or a gourmet stir-fry, this classic French cutting technique ensures even cooking, beautiful presentation, and enhanced texture. In this ultimate guide, we’ll cover everything you need to know about julienning potatoes, from step-by-step instructions to practical tips and recipes.

What Does "Julienne" Mean?
Julienne cut is a French term for slicing vegetables into long, thin, uniform strips, typically 2-3 inches long and 1/16 to 1/8 inch wide. This technique ensures even cooking and adds a professional touch to any dish.
Why It Matters: Uniform slices cook evenly, making them ideal for fries, casseroles, and more.
Tools You’ll Need
Before you start, make sure you have the right tools for the job. Here are the top three options:
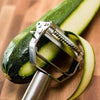
1. Julienne Peeler
This handy tool is perfect for soft vegetables like zucchini and smaller potatoes.
Pro Tip: Look for peelers with sharp, stainless steel blades for cleaner cuts.
2. Mandoline Slicer
With adjustable julienne blades, mandolines make slicing quick and uniform. Use the safety guard to protect your fingers.
Pro Tip: A mandoline is your go-to for thin, consistent strips in seconds.
3. Chef’s Knife
If you prefer the classic method, a sharp 8-inch chef’s knife and a steady hand will do the trick.
Pro Tip: Use a cut-resistant glove for added safety.
How to Julienne Potatoes: Step-by-Step Guide
Julienne Peeler Method
- Hold the potato firmly in one hand.
- Run the julienne peeler from top to bottom, creating thin strips.
- Repeat until the entire potato is julienned.
Mandoline Slicer Method
- Adjust the mandoline to the julienne setting.
- Secure the potato with the safety guard or wear a cut-resistant glove.
- Slide the potato along the blade for perfectly even strips.
Knife Method
-
Wash and Peel the Potato:
Start with a clean, peeled potato. Dry it thoroughly to prevent slipping. -
Create a Flat Surface:
Slice off one side to make a flat base for stability. -
Cut Into Planks:
Slice the potato lengthwise into thin planks, about 1/8 inch thick. -
Stack and Slice:
Stack the planks and cut them into thin strips, about 1/16 inch wide. -
Rinse the Strips (Optional):
If you're frying, soak the strips in cold water for 30 minutes to remove excess starch.

Creative Recipes with Julienned Potatoes
1. Crispy Shoestring Fries
- Ingredients: Potatoes, oil, salt, and your favorite seasoning.
- Instructions:
- Soak julienned potatoes in cold water for 30 minutes.
- Pat dry and fry in hot oil (375°F) until golden brown.
- Drain on paper towels and season immediately.
2. Classic Scalloped Potatoes
- Ingredients: Potatoes, cream, cheese, garlic, and butter.
- Instructions:
- Layer julienned potatoes in a greased baking dish.
- Pour over a creamy cheese sauce.
- Bake at 375°F for 45-60 minutes, until bubbly and golden.
3. Potato Stir-Fry
- Ingredients: Potatoes, bell peppers, onions, garlic, and soy sauce.
- Instructions:
- Stir-fry julienned potatoes with sliced vegetables in a hot wok.
- Season with soy sauce and a dash of sesame oil.
- Serve as a side dish or over rice.
FAQs About Julienned Potatoes
What’s the Difference Between Julienne and Matchstick?
Julienne cuts are slightly thinner, while matchsticks are thicker and less precise.
How Do I Prevent Potatoes from Browning After Cutting?
Soak julienned potatoes in cold water to prevent oxidation.
Can I Use a Julienne Peeler for Harder Vegetables?
Yes, but it works best with firm yet pliable vegetables. For harder potatoes, a mandoline is more efficient.
Why Choose Julienne Cuts for Potatoes?
Julienne potatoes are not only aesthetically pleasing but also cook evenly, making them ideal for a variety of dishes. From crispy fries to creamy casseroles, this technique is a must-have in your culinary toolkit.


