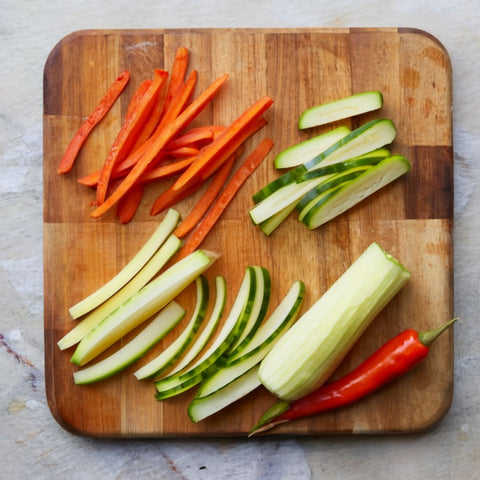
With this simple step-by-step Julienne Cut guide, you will be a French knife technique master in practically no time!
Julienne veggies can be challenging, and it requires a lot of patience. Julienne veggies makes your salads, stir fries, side decorations and dishes very appetizing. Julienned vegetables can be a great addition to your recipes.
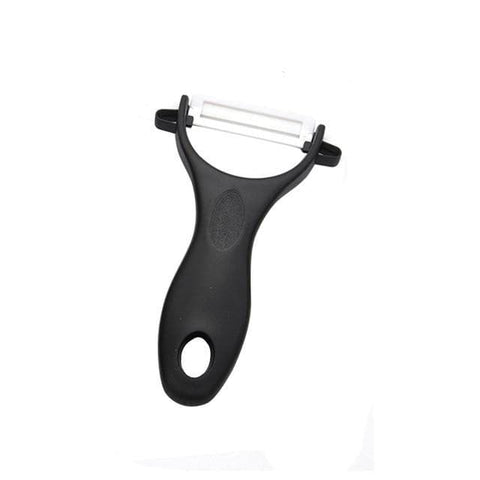
 You can make julienne ribbons from carrots to cucumbers and zucchini to bell peppers in fine, thin strips.
As a food enthusiast with years of experience, I can attest to the transformative power of the julienne cut in the culinary world. It's a technique that not only enhances the visual appeal of a dish but also elevates its overall taste and texture. The precision required in achieving uniform strips is akin to an art form, and when done right, it can truly set a dish apart. I've had the pleasure of incorporating julienne cuts into a myriad of recipes, from vibrant salads to hearty stir-fries, and the results have always been nothing short of spectacular. The julienne cut adds a level of sophistication to any dish, making it a staple in my culinary repertoire. So, for any aspiring chef or passionate home cook, mastering this technique is a worthwhile endeavor that will undoubtedly take your culinary creations to a whole new level of excellence.
When I eventually came to discover the julienne cut method I understood how much this technique is super easy, even for home cooks!
The julienne cut, also known as matchstick cut, is a culinary French knife technique that produces long, thin strips of vegetables or fruits. The julienne strips are usually about 2-3 inches long and 1/16- to 1/8-inch thick. These strips are characterized by their uniformity in size, creating a visually appealing and texturally pleasing element in dishes.
It’s perfect for making super slim, crunchy pieces of carrot, cucumber, french fries, or bell pepper for diverse recipes, salads and garnishes.
Kitchen knife. An 8-inch chef’s knife is ideal. It should be a very sharp knife.
Wooden cutting board. Wood is an easier board to cut vegetables. It’s much more stable, allowing for precise cuts.
Vegetable peeler. You need this for peeling the vegetables before you start to cut them.
Julienne peeler. My favourite tool to make julienne strips from any vegetable.It’s durable and helps you make perfectly uniformly julienned vegetables in a few seconds.
Achieving a perfect julienne cut necessitates the use of the right tools. A sharp chef's knife or a dedicated julienne peeler is essential. Additionally, investing in a sturdy cutting board with a non-slip surface ensures safety and accuracy. I really like to julienne veggies with a julienne peeler instead of a knife. It’s super easy to make the julienne strips when you have a high quality julienne peeler.
The big advantage of a julienne peeler is its ability to create thin strips more efficiently and effortlessly. A julienne peeler can cut almost all kinds of vegetables easily. Whether it is large or hard. The julienne peeler has much more outcomes when it comes for home use. It’s a versatile tool and you can peel veggies into thin ribbons, making high quality salads and side dishes. In addition, when it comes to cleaning, the julienne peeler is much easier to clean.
First, wash your vegetable of choice well, to remove any leftover dirt or pesticides still lingering on the surface. For vegetables like carrots or cucumbers, trim the ends to create a flat surface.
Cut the vegetable into 2- to 3-inch long pieces, depending on the desired julienne length. Cut away and discard the stem or root end.
Next, set the sliced pieces cut-side down on a cutting board and trim away a thin slice from one rounded side. This helps to square it off and make for a stable base to lay down on the cutting board.
Stack a few of these slices together at a time, and put them back on the board cut-side down. Cut them once more into 1/16- to ⅛-inch ribbons, creating a uniform matchstick julienne strips.
As I’ve already mentioned, I prefer to make julienne strips with a julienne peeler. It’s much easier and the results are perfect.
To make julienne riboons with a julienne peeler, press and hold the vegetable down firmly on a cutting board and slide the julienne peeler from the top downwards, making even slices all the way through the fruit or vegetable. Use your free hand to hold the veggie down at the top, so that you keep your fingers away from the sharp blade.
Once you reach the end, shake the slices off your peeler and return to the top, pulling the blade all the way down through the vegetable again. Repeat this process until you’ve julienned your entire vegetable.
You can julienne various veggies like: carrots, zucchini, sweet potatoes, squash, turnips, cucumbers, beets, cabbages, potatoes and more.
FAQs (Frequently Asked Questions)
Can I achieve a julienne cut with any type of knife?
Yes, while a chef's knife is the preferred tool, a dedicated julienne peeler can also produce excellent results.
Are there specific vegetables that are best suited for julienne cuts?
Firm vegetables like carrots, zucchinis, and cucumbers are ideal for julienne cuts due to their ease of handling and uniform texture.
How do I store julienne-cut vegetables?
Place them in an airtight container or a resealable plastic bag and store them in the refrigerator. They're best used within two to three days for optimal freshness.
Can I julienne-cut fruits for desserts?
Absolutely! Firm fruits like apples, pears, and melons can be beautifully julienne-cut for salads, garnishes, or fruit arrangements.
What are some dishes that prominently feature julienne-cut vegetables?
Popular dishes include stir-fries, salads, and sushi rolls, where the julienne cut adds both visual appeal and a delightful crunch.
Conclusion:Julienne cuts of zucchini is a perfect technique. The skin of zucchini is thin which makes it easy to peel. However, using julienne peelers can be extremely helpful. They make the task super fast and easy. A lot of people are unable to peel zucchini with a knife and if you are one of them, then using julienne peelers is the best way to get rid of the task. Make sure that not every cucumber peeler can shred zucchini in the right way, so it's recommended that you will use a julienne peeler to make zucchini strips.
Don't forget to cut off the blossom end. But if you are going to use kitchen master mandoline slicer for shredding it, then let the stem remain attached to the zucchini. It makes your hand grip firmer on the vegetable and saves it from cutting on the end of the slicer. But if you are using an auto food processor, it is best to cut it off. Once down, shred it to the size that you want for your meal.
Using a kitchen master mandoline slicer for zucchini is great if you are trying to make zucchini lasagna. The mandoline slicer is used for creating lasagna or pasta-like strips of zucchini. So how to use a mandoline slicer for zucchini? It is simple. There are different settings of the slicer and you adjust it according to the thickness that you desire. It is best if you invest in a flat kitchen master mandoline slicer as the thickness remains uniform.
Making noodles and lasagna through a knife can be extremely tough. It becomes a long process. Thus, it is best if you invest in a mandoline slicer for this purpose.
CONCLUSION:
Zucchini is a healthy vegetable and you must benefit from it during the summertime. Using a julienne peeler to peel it can make the task of making your meal, faster. Also, use a mandoline slicer to get the best zucchini lasagna noodles, within no time. The Kitchen Master mandoline slicer is the best one to rely upon but you can buy any other that you like the most. The kitchen master equipment are long-lasting, therefore, we highly recommend them.
The first decision you'll encounter is whether to opt for an adjustable or fixed blade mandoline slicer. Adjustable models allow you to alter the thickness of the slices, providing versatility in your culinary creations. On the other hand, fixed blade slicers offer a single, consistent thickness, making them ideal for specific slicing needs.
The material of the slicer greatly impacts its durability and performance. Stainless steel mandoline slicers are renowned for their robustness and resistance to corrosion, ensuring longevity. Conversely, plastic slicers offer affordability and ease of use, but may not be as long-lasting.
Safety should always be a paramount concern when dealing with sharp kitchen tools. Look for a mandoline slicer equipped with safety features such as a hand guard or a non-slip base to prevent accidents and provide peace of mind during use.
Consider the types of blades included with the mandoline slicer. Straight blades are perfect for clean, even slices, while serrated blades excel at cutting through softer produce. Additionally, a julienne blade opens up a world of possibilities for creating fine strips of vegetables for salads and garnishes. Those of you who have a julienne peeler can use the julienne option separately, but it is much more comfortable to have a mandoline slicer that has all cutting features together in one tool.
Some mandoline slicers come with supplementary attachments, such as graters and spiralizers, expanding their functionality beyond simple slicing. These additions can be invaluable for preparing a diverse range of dishes.
Ergonomics play a crucial role in ensuring a comfortable and controlled slicing experience. Look for a mandoline slicer with an ergonomic handle that provides a secure grip, reducing the risk of hand fatigue.
Cleaning up after culinary endeavors should be hassle-free. Opt for a mandoline slicer with components that are safe for the dishwasher, simplifying the post-cooking cleanup process.
After meticulous research and testing, we've narrowed down the selection to two outstanding mandoline slicers that exemplify quality, performance, and safety:
The round mandoline slicer is a versatile slicing tool that makes food prep faster and easier. Whether you want to make thin or thick slices, all you need to do is just adjust the blades and to start slicing your veggies. The round mandoline blades made of high quality stainless steel. It comes with 3 interchangeable sharp blades for different cutting choice: fine, coarse, grating and slicing.
This multifunctional vegetable slicer meets all your slicing and grating needs. The Fullstar vegetable slicer is perfect for zoodles, spiralizing, healthy vegetable ribbons and side garnishes. It comes with a protective hand holder and a large storage box, so it’s easy to slice numerous vegetables at once. Its blades are easy for disassembly. You can easily adjust the blade for your cutting needs. It's also a space save. The blades of the Fullstar mandoline slicer are very sharp and made of stainless steel.
A safe mandoline designed with safe hide blades and stability to protect your hands and fingers away from blades makes it safer and easier to slice veggies. By rotating the regulators and pressing the handle, you can adjust and cut various vegetables and fruits into unique shapes.
This adjustable mandoline slicer is a professional mandoline slicer with a simple and safety design. It comes with 4 adjustable thickness settings for each cutting option: thick slice, thin slice, julienne and waffle. Adjustable knob provides manual settings easily ,only with a quick turn of the wrist. Safety handheld with a non slip handle and anti slip rubber pads provide a comfortable hand grip.
Kitchen Master Mandoline Slicer-
A- 7 piece kitchen master mandoline slicer lets you easily cut and chop vegetables in a fast way. All you need to do is just choose the size of the veggies you want to cut, put the appropriate knife and pull down the handle.
Mandoline Slicer Cutter Chopper And Grater-
Slice, peel, grate, chop and wash veggies and fruits easily with this all in one magnificent mandoline slicer cutter chopper and grater!
You can even use it to separate egg whites. The mandoline slicer cutter chopper and grater blades are very sharp and made from stainless steel material.
Kitchen Master Multipurpose Slicer/Dicer With Peeler Tool-
Comes with 6 sharp blades, protective hand holder, storage box, hold board, vegetable peeler tool and cleaning brush. When you want to slice vegetables all you need to do is to decide what kind of shape you want to cut the vegetables, choose the right blade, wrap your fingers on the designated place in the protective hand and slide it securely. The kitchen master multipurpose slicer/dicer helps you make food more gracefully, it is an eco-friendly slicer as it is designed from wheat straw material for protecting the environment from pollution.
There are different types of mandoline slicers available in the market:
French mandolines- This type is the traditional and classic design for a mandoline. They are large and bulky, however they are really secure and safe. French mandolines come with a straight blade. They are made from durable stainless steel material so they will last for a long time. This mandoline type could be a great option if you are planning to use a wide variety of blades.
Japanese mandolines- have a lighter, smaller and compact design in comparison to French mandolines. Japanese mandolines designed with a variety of thickness levels. The blades are really sharp and durable. Their slim and compact design make them a perfect match for a home kitchen
V-Shaped mandolines- The V-shaped mandolines have two entry points for cutting vegetables, which makes it super easy to slice vegetables as you don’t have to apply as much pressure. These are a great option for slicing veggies larger.
Safety
Most mandoline slicers come with a hand protector. Hand protectors are designed to protect your hands from getting sliced on the blade. The hand protectors have metal prongs to place the food so you can slice easily.
Handles and grips: You should choose a mandoline that has large handles and safety grip to help keep slicer in place when cutting. A secure grip minimizes potential injuries and accidents.
Hand held protector: One of the most important things you need to consider when shopping for a mandoline slicer is that it has a hand held protector. The hand held protector is made from plastic material and its purpose is to protect your hands from accidentally getting sliced on the blade. The hand held protectors usually come with a metal prong to secure the food so you can slice easily.
Blade Type
We use mandoline slicers for slicing vegetables so the blades are one of the most important things we should check. Every type of mandoline slicer has different slicing capabilities for different purposes. You should consider choosing your mandoline slicer by the types of food you’ll be cutting and how frequently you’ll use the mandoline.
Additional blades: The big advantage the best mandolines in the market offers is the diversity of slicing options. Looking to make a quick salad or decorations? Most mandolines include blades for making julienne cuts or wavy cuts as well as the standard straight slices. For mandolins with multiple options, it’s recommended to check whether there's an option for easy storage so you won’t lose pieces in your gadget drawer.
Size
Depending on the storage space in your kitchen, you should select a mandoline that you could easily store and handle. If you’re buying a mandoline that comes with interchangeable blades, you should choose a mandoline that has a built-in storage place also for blades.
Selecting the best mandoline slicer is a pivotal step towards achieving culinary excellence. By considering factors such as blade types, materials, safety features, and additional attachments, you can make an informed decision that aligns with your specific needs. Rest assured that you're investing in a tool that will enhance your culinary journey.
If you're wondering how to use a mandoline slicer in the right way, read this artice.
]]>In recent years, the culinary world has witnessed a surge in the popularity of alternative noodles, and among them, sweet potato noodles have emerged as a star player. These vibrant and nutritious noodles have captured the attention of food enthusiasts and health-conscious individuals alike. In this comprehensive guide, we'll delve into the world of sweet potato noodles, exploring their origins, nutritional benefits, cooking methods, and even some mouthwatering recipes to satisfy your taste buds.
Sweet potato noodles, often referred to as "glass noodles" or "japchae noodles," are made from sweet potatoes. Unlike traditional pasta, they are gluten-free and offer a unique texture and flavor. These noodles are a staple in various Asian cuisines and are gaining popularity worldwide for their health benefits.
Sweet potato noodles have a rich history that can be traced back to Asia. They have been a dietary staple in countries like Korea, Japan, and China for centuries. In Korean cuisine, sweet potato noodles are a key ingredient in dishes like Japchae, a colorful and flavorful stir-fry.
Sweet potato noodles are a fantastic option for those looking to manage their calorie intake. A 100-gram serving contains only about 70 calories, making them an excellent choice for weight-conscious individuals.
These noodles are naturally gluten-free, making them suitable for people with gluten sensitivities or those following a gluten-free diet.
Sweet potato noodles are a good source of dietary fiber, which aids digestion and helps maintain a feeling of fullness. They can contribute to better digestive health.
They are a great source of essential nutrients like vitamin A, vitamin C, and potassium, which support immune health and overall well-being.
Sweet potato noodles contain antioxidants that combat free radicals in the body, reducing the risk of chronic diseases and promoting a healthy complexion.
To cook sweet potato noodles, bring a pot of water to a boil, add the noodles, and cook for about 5-7 minutes until they become translucent and tender. Drain and rinse with cold water to prevent sticking.
One of the most popular ways to enjoy sweet potato noodles is by stir-frying them with an array of colorful vegetables and your choice of protein. The result is a delightful, flavorful dish that's both satisfying and healthy.
Create a refreshing sweet potato noodle salad by tossing them with your favorite greens, dressing, and protein. It's a perfect dish for hot summer days.
Bursting with colors, flavors, and wholesome goodness, Sweet Potato Noodles with Garlic and Kale recipe brings together the earthy sweetness of sweet potatoes, the aromatic allure of garlic, and the robust vitality of kale in a harmonious symphony of taste and texture.
Japchae is a classic Korean dish that features sweet potato noodles stir-fried with an assortment of vegetables and marinated beef or tofu. The combination of savory and slightly sweet flavors is simply irresistible.
Combine sweet potato noodles with a creamy peanut sauce, fresh herbs, and crunchy peanuts for a Thai-inspired dish that's quick to prepare and bursting with flavor.
Sweet potato noodles are not just a delicious alternative to traditional pasta; they also offer numerous health benefits. With their rich history, gluten-free nature, and versatility in the kitchen, they have rightfully earned their place on the plates of those seeking a nutritious and flavorful meal.
For more culinary inspiration and to explore a world of flavors, give sweet potato noodles a try in your next meal. Your taste buds and your body will thank you.
Yes, sweet potato noodles are lower in carbohydrates compared to wheat-based pasta, making them a suitable option for individuals following a low-carb diet.
Yes, you can make sweet potato noodles at home using a spiralizer or julienne peeler. Simply peel and spiralize a sweet potato to create your own homemade noodles.
No, sweet potato noodles and yam noodles are not the same. While they may appear similar, they come from different plant species and have distinct flavors and textures.
No, sweet potato noodles have a mild, slightly sweet flavor that pairs well with a variety of sauces and ingredients.
Absolutely! Sweet potato noodles are a fantastic addition to cold salads, providing a unique texture and flavor that complements fresh vegetables and dressings.
Ingredients:
2 medium sweet potatoes, peeled and spiralized into noodles
2 tablespoons olive oil
3 cloves garlic, minced
4 cups kale, stems removed and chopped
Salt and pepper to taste
Red pepper flakes (optional, for added heat)
Grated Parmesan cheese (optional, for garnish)
Instructions:
Prepare the Sweet Potato Noodles:
Peel the sweet potatoes and spiralize them into noodles using a julienne peeler. If you don't have a julienne peeler, you can use a vegetable slicer to make long, thin strips.
Cook the Sweet Potato Noodles:
Heat 1 tablespoon of olive oil in a large skillet over medium heat.
Add the sweet potato noodles to the skillet and sauté for about 5-7 minutes, or until they are tender but not mushy. Stir occasionally to cook them evenly. Remove the noodles from the skillet and set them aside.
Cook the Garlic and Kale:
In the same skillet, add the remaining 1 tablespoon of olive oil.
Add the minced garlic and sauté for about 1 minute, or until it becomes fragrant.
Add the chopped kale to the skillet and sauté for 3-5 minutes, or until it wilts and becomes tender. Season with salt, pepper, and red pepper flakes if you like it spicy. Stir occasionally.
Combine and Serve:
Return the cooked sweet potato noodles to the skillet with the garlic and kale.
Toss everything together to combine and heat through for about 2-3 minutes.
Taste and adjust the seasoning with additional salt, pepper, or red pepper flakes if needed.
Garnish and Serve:
Once everything is well combined and heated, transfer the sweet potato noodles, garlic, and kale to serving plates.
If desired, sprinkle some grated Parmesan cheese on top for added flavor and garnish.
Enjoy!
Serve your Sweet Potato Noodles with Garlic and Kale immediately while they are hot. This dish is both nutritious and delicious, making it a perfect meal for a healthy dinner.
Feel free to customize this recipe with your favorite ingredients or add some protein like grilled chicken or tofu for an extra boost of protein. Enjoy your meal!
]]>
Are you a kitchen person? Do you also love cooking? Then probably you know the struggles in terms of chopping the fruits as well as the vegetables in preparing for the meal that you want to cook. If you are looking for a quick way to chop the vegetables, then you may want to consider a mandoline slicer.
A mandoline slicer is a versatile tool that can revolutionize your kitchen experience. In this guide, we'll walk you through everything you need to know about how to use a mandoline slicer effectively, ensuring you achieve consistent and professional-grade slices. From choosing the right blade to mastering safety techniques, let's dive into the art of precision slicing.
Mandolines are best to use on vegetables and fruits, may it be thick or thin, ripe and unripe. Depending on what you are slicing, you can choose the way to slice it. Mandoline has different types of blades for various application such as flat slicing, Julienne slicing, coarse shredding, and fine shredding. Wonder what mandoline is best ? If you are considering to buy a mandoline, here are the best types to consider:
Before slicing, wash, rinse, and peel the vegetables. Cut the larger ones it into half so that it will fit in and get into the blade properly to have a better control.
Selecting the right blade is crucial for achieving the desired cut. Different blades are designed for specific tasks, such as julienning, slicing, and wavy cuts. Ensure the blade is securely attached before use to prevent accidents.
You should place the mandoline over a clean and flat surface. Place a non-slip mat or a damp cloth beneath the slicer to prevent any unwanted movement. This ensures stability and reduces the risk of accidents during operation.
You can also use a cutting board to set the mandoline. Choose the blade that can produce the slice that you like and slide it securely. If you are not sure on how to conveniently secure the blade, see the manual for your guide.
Achieving Your Preferred Thickness
Most mandoline slicers come with adjustable settings for slice thickness. Whether you're aiming for paper-thin slices or thicker cuts, adjust the settings accordingly. Start with a higher setting and work your way down to find the perfect thickness for your dish.
Safety is paramount when using a mandoline slicer. Always use the provided hand guard to protect your fingers from the sharp blades. Attach the guard into the vegetable or fruit that you want for slicing and firmly press the prong to push in the produce.
Use your left hand to hold the mandoline, and your right hand will have the control to slice the fruit or any vegetable. Have a strong grip of the finger guard so that you can use good amount of pressure over the produce towards the blade. Slide it back and forth and do the slicing.
Caring for Your Mandoline Slicer
After use, clean the slicer thoroughly, paying extra attention to the blades. Use a brush or sponge to remove any food residue. Store the slicer in a safe place, ensuring the blades are covered to prevent any accidents.
There are many mandoline slicers in the marketplace nowadays. Before you choose a product, always remember that whatever vegetables or fruits that you want to chop using the mandoline, it is best that you know how to operate the mandoline slicer. You can also check the manual for safety precautions.
Can I use a mandoline slicer for all types of vegetables?
Yes, a mandoline slicer can be used for a wide variety of vegetables, including potatoes, cucumbers, carrots, and more. However, it's essential to choose the right blade for each specific vegetable.
How do I prevent my slices from sticking together?
To prevent slices from sticking, lightly dust them with flour or cornstarch. This creates a barrier and keeps them separate.
Is it possible to achieve different types of cuts with a mandoline slicer?
Absolutely! Most mandoline slicers come with interchangeable blades, allowing you to achieve various cuts like julienne, wavy, and crinkle cuts.
What safety precautions should I take while using a mandoline slicer?
Always use the hand guard provided to protect your fingers. Additionally, maintain a stable surface, keep your hand in the correct position, and proceed with caution.
Can I wash my mandoline slicer in the dishwasher?
It's recommended to hand wash your mandoline slicer, as the high water pressure in dishwashers can damage the blades and reduce their effectiveness.
How often should I sharpen the blades of my mandoline slicer?
The frequency of blade sharpening depends on usage. However, it's advisable to sharpen them every few months or when you notice a decrease in performance.
Mastering how to use a mandoline slicer opens up a world of culinary possibilities. With the right techniques and safety measures in place, you'll be creating restaurant-quality slices in no time. Remember to always prioritize safety and maintenance for a seamless slicing experience.
Whether you are looking for the good vegetable slicer, or you want to have a fast way to slice your vegetables and fruits for your dish, Mandoline is the best for you! So what are you waiting for? Order now and enjoy cooking with the aid of a mandolin slicer!
]]>When it comes to cooking vegetables, green beans are a versatile and nutritious option that can be enjoyed in various dishes. However, achieving that perfect tenderness without overcooking or undercooking them can be a bit tricky. In this comprehensive guide, we'll explore the ideal duration for boiling green beans to ensure they are both flavorful and nutritious.
Before diving into the specifics of how long to boil green beans, let's understand why cooking time matters. Green beans, like many vegetables, contain essential vitamins and minerals that are sensitive to heat. Cooking them for the right amount of time can help preserve these nutrients and deliver a satisfying texture.
Several factors can influence the cooking time of green beans. It's essential to consider these variables to achieve the desired results:
Fresh green beans will typically require less time to cook compared to older, tougher ones. Choose beans that are vibrant in color and snap easily to the touch for the best results.
The size of the green beans can impact cooking time. Thinner beans will cook faster than thicker ones. Keep this in mind when preparing your beans.
Your personal preference for the texture of green beans plays a significant role in determining the cooking time. Some prefer beans with a bit of crunch, while others like them very tender.
Believe it or not, your geographical location matters. At higher altitudes, water boils at a lower temperature, which can affect cooking times. Adjust accordingly if you live in a high-altitude area.
Now that we've covered the factors that influence boiling time, let's get to the heart of the matter: how long should you boil green beans?
If you want your green beans to be crisp and vibrant, blanching is the way to go. Bring a pot of water to a boil, add salt, and blanch the beans for 1-2 minutes. Then, transfer them to an ice bath to halt the cooking process.
For green beans that are tender yet still have a pleasant crunch, boil them for 3-4 minutes. Remember to season the water with salt for added flavor.
If you prefer your green beans to be fully tender with a softer texture, boil them for 5-7 minutes. Again, don't forget to add salt to the boiling water.
In conclusion, the perfect boiling time for green beans depends on your preferences and the specific dish you're preparing. Whether you like them crisp or fully tender, understanding the factors that influence cooking time will help you achieve the results you desire. Experiment, taste, and enjoy your perfectly cooked green beans.
FAQs (Frequently Asked Questions)
1. Can I use frozen green beans, and how does that affect boiling time? Yes, you can use frozen green beans, but they may require slightly longer cooking times. Follow the instructions on the packaging for best results.
2. Do I need to blanch green beans before freezing them? Blanching is recommended before freezing green beans to preserve their color, flavor, and texture. Blanch for 2-3 minutes, then transfer to an ice bath before freezing.
3. What are some delicious seasonings for boiled green beans? Popular seasonings include garlic, lemon zest, butter, and toasted almonds. Experiment with your favorite flavors to enhance your green bean dish.
4. Can I overcook green beans? Yes, overcooking can lead to mushy and less flavorful green beans. Be mindful of your cooking time to avoid this.
5. Are green beans a healthy vegetable choice? Yes, green beans are a healthy vegetable choice. They are low in calories and rich in vitamins, minerals, and dietary fiber.
Now that you have all the information you need to boil green beans to perfection, it's time to head to the kitchen and put your culinary skills to the test! Remember to enjoy the process and savor the delicious results.
]]>Grilled onions can elevate your culinary creations to a whole new level. Their sweet, caramelized goodness pairs beautifully with burgers, sandwiches, salads, and even as a side dish. In this guide, we'll share the secrets to achieving perfectly grilled onions that are tender, flavorful, and impossible to resist.
Not all onions are created equal when it comes to grilling. Opt for large, sweet varieties like Vidalia or Walla Walla. These onions have a milder flavor and higher sugar content, making them ideal for caramelization on the grill.
Start by peeling the onions and slicing them into rounds, about 1/2 inch thick. You can use an onion slicer to make it easier and quicker. Keep the slices consistent in size to ensure even grilling.
Marinating the onion slices before grilling can enhance their taste. A simple blend of olive oil, balsamic vinegar, garlic, and your favorite herbs and spices can infuse the onions with extra depth and aroma.
A gas or charcoal grill works well for grilling onions. Ensure the grates are clean and oiled to prevent sticking.
Preheat your grill to medium-high heat. This temperature is perfect for achieving that delightful caramelization without overcooking the onions.
You have two primary grilling options: direct heat and indirect heat. Direct heat involves placing the onions directly over the flames, while indirect heat means cooking them on the cooler side of the grill. Experiment with both methods to find your preferred texture and flavor.
A grill basket can make the grilling process more manageable. It prevents small onion pieces from falling through the grates and allows for easy flipping.
Another technique is to skewer the onion slices together. This method simplifies turning multiple slices at once.
Gently flip the onion slices using tongs or a spatula when they develop grill marks and turn translucent. This ensures even cooking on both sides.
Keep an eye on the grill temperature, adjusting it as needed to prevent burning. Consistency is key to achieving the perfect caramelization.
The cooking time can vary depending on the thickness of your onion slices and the heat of your grill. On average, grill them for 5-10 minutes per side until they're tender and slightly charred.
To infuse your grilled onions with a smoky twist, consider using wood chips or chunks on a charcoal grill. This adds depth and complexity to their flavor profile.
You'll know your onions are ready when they are soft, golden brown, and have a delightful aroma. Taste-testing is encouraged!
Grilled onions are incredibly versatile. Serve them on burgers, as a topping for hot dogs, in salads, or alongside grilled meats. Their sweet and savory profile complements various dishes.
While grilling onions is relatively straightforward, there are some common pitfalls to watch out for. Avoid cooking them at too high a temperature, which can result in burning, and don't overcrowd the grill, as it can lead to uneven cooking.
Grilling onions is a delightful culinary adventure that can enhance your meals with their sweet, smoky, and caramelized goodness. Experiment with different techniques and flavors to find your perfect grilled onion recipe.
Can I use red onions for grilling?
What dishes can I use grilled onions in?
Can I grill onions on an indoor grill pan?
What is the best way to store leftover grilled onions?
Are grilled onions a healthy option?
Now that you've learned the art of grilling onions, it's time to put your skills to the test and savor the rich, smoky flavors of perfectly caramelized onions.
]]>
Step 1: Remove the Outer Leaves
Start by removing any outer leaves that are damaged or wilted. These leaves are usually tougher and not as fresh as the inner leaves. You can also use a sharp knife to cut off the bottom stem of the cabbage.
Step 2: Cut the Cabbage in Half
Using a sharp knife, cut the cabbage in half, from the top to the bottom. Make sure to cut it right through the middle of the stem. This will make it easier to remove the core and shred the cabbage.
Step 3: Remove the Core
Use a sharp knife to cut out the core from each half of the cabbage. The core is the tough, white part that runs through the center of the cabbage. Removing the core will make it easier to shred the cabbage.
Step 4: Shred the Cabbage
Now that you have removed the core, it's time to shred the cabbage. There are a few ways to do this, but we recommend using a sharp knife to slice the cabbage into thin strips. Start by slicing the cabbage in half, and then slice each half into thin strips. You can also use a mandoline slicer or a food processor to shred the cabbage.
Coleslaw: Shredded cabbage is a common ingredient in coleslaw. To make a simple coleslaw, mix shredded cabbage with mayonnaise, vinegar, sugar, and salt. You can also add other ingredients, such as carrots, onions, and peppers, for added flavour.
Salads: Shredded cabbage can be used as a base for many salads. It adds a crunchy texture and a mild, sweet flavour. Try mixing shredded cabbage with other greens, such as lettuce or spinach, and top it with your favourite dressing.
Stir-fries: Shredded cabbage is also a great ingredient for stir-fries. It cooks quickly and pairs well with other vegetables and protein sources, such as chicken or tofu. Try stir-frying shredded cabbage with garlic, ginger, and soy sauce for a quick and easy side dish.
Shredding cabbage with a mandoline can save you time and effort, and give you consistent, uniform results.
Follow these simple steps to shred cabbage with a mandoline:
Set up your mandoline: Place the mandoline on a flat surface, such as a cutting board or countertop. Adjust the blade to the desired thickness for your shred. Most mandolines have a dial or lever that allows you to adjust the blade.
Prepare your cabbage: Remove any tough or wilted outer leaves from the cabbage. Cut the cabbage in half, and then cut out the core. Rinse the cabbage under cold water and pat it dry.
Begin shredding: Hold the cabbage half with one hand and use the other hand to slide it back and forth over the blade. Be sure to use a guard or holder to protect your fingers from the sharp blade.
Continue shredding: Once you have shredded one side of the cabbage half, turn it over and shred the other side. You may need to adjust the thickness of the blade as you go to achieve the desired shred.
Repeat with the other half: Repeat the shredding process with the other half of the cabbage. You should end up with a pile of uniformly shredded cabbage.
Clean up: After you have finished shredding the cabbage, be sure to clean the mandoline thoroughly. Wash the blade with soap and water, and dry it carefully. Be sure to put the guard or holder back in its proper place for safekeeping.
Shredding cabbage with a mandoline is a quick and easy way to prepare cabbage for your favourite recipes. Just be sure to use caution when handling the sharp blade, and always use a guard or holder to protect your fingers.
Shredding cabbage with a vegetable peeler is a simple and effective technique that can be done with minimal equipment. Follow these steps to shred a cabbage with a vegetable peeler:
Remove any tough or wilted outer leaves from the cabbage. Cut the cabbage in half, and then cut out the core.
Hold one of the cabbage halves in your non-dominant hand. Use the vegetable peeler in your dominant hand to make long, continuous strokes along the edge of the cabbage.
Continue peeling: As you peel the cabbage, the layers will naturally separate into thin, long strips. Continue peeling the cabbage, rotating it as needed, until you have peeled the entire half.
Repeat with the other half: Repeat the peeling process with the other half of the cabbage. You should end up with a pile of uniformly shredded cabbage.
If you find that the cabbage strips are too long, you can cut them into smaller pieces with a knife.
Shredding cabbage with a vegetable peeler can be a bit time-consuming, but it's a great way to get uniformly shredded cabbage without any specialised equipment. Plus, you can use the leftover cabbage core in other recipes, such as soup or stock. Give it a try the next time you need shredded cabbage for a recipe!
FAQs:
Q. How finely should I shred the cabbage?
A. It depends on the recipe you're using. For coleslaw or sauerkraut, you may want to shred the cabbage finely. For stir-fries or soups, a coarser shred may be more appropriate.
Q. Do I need to remove the core of the cabbage before shredding
A. Yes, it's best to remove the core before shredding. You can do this by cutting the cabbage in half and then cutting out the core.
Q. Can I shred cabbage in advance?
A. Yes, you can shred cabbage in advance and store it in the fridge or freezer until you're ready to use it.
Conclusion
In conclusion, shredding cabbage is a simple task that can be done quickly and easily. By following the steps we have outlined, you can shred cabbage in no time and use it in a variety of dishes. Whether you are making coleslaw, salads, or stir-fries, shredded cabbage adds a healthy crunch and a mild, sweet flavour. We hope this guide has been helpful and informative, and we look forward to seeing you use your shredded cabbage in many delicious recipes.
]]>To help you out, we've rounded up a list of some of the best kitchen gadgets that you'll find yourself using on a daily basis.
Julienne Vegetable Peeler- This julienne peeler is a must-have kitchen tool in any kitchen. It helps you make perfectly julienned vegetables in a few seconds. Peeling, slicing and julienning vegetables have never been so easy.
Take your new julienne vegetable peeler and peel veggies into thin ribbons, making restaurant-quality salads and side dishes.
Round Mandoline Slicer- Add a round mandoline slicer to your loved kitchen for a versatile slicing option that makes food prep faster and easier. No matter if you want to make thin or thick slices, all you need to do is just adjust the blades and start slicing.
Avocado Slicer- The 3-in-1 avocado cutter helps you split, pit and slice avocados effectively and effortlessly. This handy kitchen tool is perfect for any avocado lover, whether you are making guacamole, avocado toast or just slicing it up for a salad.
Watermelon Windmill Slicer- Get small watermelon cubes sliced in no more than a second with Just a single push. If you are looking for cutting watermelon in a fast and easy way, the watermelon windmill slicer will do it really well.
Stainless Steel Garlic Press- Press and crush garlic easily. Crush a ton of garlic at once with the stainless steel garlic press. You can use it to peel, crush, and mince garlic and ginger.
Ceramic Egg Separator- The cutest way to separate your egg yolks from your egg whites.The small mouth in front is in hollow-carved design and hand-painted in yellow color to separate the egg white and egg yolk easily and brings a lovely feel.
6 in 1 Multi Can And Jar Opener- The 6 in 1 Multi Can And Jar Opener lets you easily open a variety of cans, jars and bottles. A soft non-slip grip coating and rubber inside it that helps open even the most stubborn jar and bottle lids.
Kitchen Master Mandoline Slicer - If you're tired of slicing and dicing by hand, a mandoline slicer can make your life much easier. It's perfect for slicing vegetables and fruit evenly, and it's much faster than using a knife.
Handheld Milk Frother -Use the handheld milk frother to mix nutritious protein powder drinks without a blender or bottle shaker to wash. In addition, you can also use the milk frother to beat egg whites and egg yolks.
These are just a few of the many kitchen gadgets that are available, but they are definitely some of the most useful and versatile. Whether you're an experienced cook or just starting out, these tools will make your time in the kitchen more efficient and enjoyable.
]]>Cutting a watermelon may sound hard for a lot of us. Thanks to this easy method for cutting watermelon, you will have the option of using this tasty fruit regularly. When you learn how to cut a watermelon properly, you can store it in the fridge for long days and eat it on a daily basis.
I owe the revelation of the best way to cut a watermelon to my best friend. Her 3-year-old daughter is absolutely hooked on it , so she set out to speed up the cutting process for everyone.
This is the easiest method to cut a watermelon you’ll find.
Here is a step-by-step guide on how to cut a watermelon:
Step 1: Gather your tools. To cut a watermelon, you'll need a large, sharp knife and a cutting board. If you have a melon baller, that can also be helpful for scooping out the fruit.
Step 2: Cut off the ends of the watermelon. Using your sharp knife, slice off the top and bottom ends of the watermelon. This will give you a stable base to work with and make it easier to slice the watermelon into rounds or cubes.
Step 3: Cut the watermelon into slices or cubes. There are a few different ways you can cut a watermelon, depending on your preference.
To cut the watermelon into slices, stand the watermelon up on one of the cut ends, and slice it into rounds that are about 1-inch thick. If you want to remove the rind, you can use the tip of your knife to gently separate the rind from the flesh.
To cut the watermelon into cubes, slice the watermelon into rounds as described above. Then, cut each round into smaller wedges, and dice the wedges into cubes.
Step 4: Scoop out the fruit. Use a spoon or melon baller to scoop out the fruit from the rind. Alternatively, you can slice the wedges or cubes into smaller pieces if you prefer.
Step 5: Enjoy! Serve the watermelon slices or cubes on their own, or use them in fruit salad or other recipes.
To cut a watermelon into balls, start by cutting off the rind and slicing the watermelon in half. Then, cut each half into slices. Take one slice and use a small cookie cutter or a melon baller to create balls out of the watermelon flesh. Repeat this process with the remaining slices. Once all of the balls have been cut, enjoy them as a refreshing snack or add them to a fruit salad for some added sweetness.
Gather your tools. You will need a watermelon slicer and a cutting board.
Rinse the watermelon. Use cold water to rinse the exterior of the watermelon, as this will help to remove any dirt or debris.
Slice off the ends of the watermelon. Use the watermelon slicer to slice off both ends of the watermelon, exposing the pink flesh inside.
Slice the watermelon into rings. Hold the slicer with the blade facing down and slice the watermelon into thin rings.
Remove the rind. Use the slicer to remove the green rind from each ring.
Slice the rings into wedges. Cut each watermelon ring into wedges using the slicer.
By using a watermelon slicer, you can easily and efficiently slice a watermelon into wedges. This tool is especially useful if you need to slice a large quantity of watermelon at once.
Watermelon Recipe
Ingredients:
1 small watermelon
1/4 cup honey
1/4 cup chopped almonds (optional)
Instructions:
Conclusion: With these tips and tricks, you'll be a pro at cutting watermelon in no time. Whether you prefer slices or cubes, this juicy fruit is a delicious addition to any meal. So next time you're wondering how to cut a watermelon, just follow these simple steps and enjoy!
]]>
These microfiber cotton towels come with dual-sized fibers so that you can clean twice as faster. In addition, they are incredibly soft and categorized by size for different uses.
These microfiber cloths are made of high-quality material far better than any drying towel or microfiber cloth you have experienced before. As a result, they are perfect for cleaning cupboards, stainless steel pots, and much more.
These microfiber cloths are a must-have if you are a cleaning fanatic. They have been manufactured with deep love and passion for completely revolutionizing your cleaning experience. The towels in this set are made out of coral velvet material with undeniable absorption power.
The four-piece clothing towels are very absorbent with quick-dry technology built into them. In addition, they come in four colors and provide versatile cleaning use. The towels are made out of coral velvet material to assist you in your cleaning chores.
This microfiber clothing test consists of five towel pieces. They are suitable for every cleaning activity because of their microfiber and durable composition. The towels do not decay or lose their effective cleaning capability upon continuous use.
A julienne peeler is a hand-held vegetable peeler that helps you create ribbons or thin strips out of your vegetables easily.
A julienne vegetable peeler is a must-have kitchen tool in any kitchen. It helps you make perfectly julienned vegetables in a few seconds.
Julienne peelers are best kitchen gadgets for zesting, adding garnishes to your dishes and making salad toppings. Thin vegetable ribbons can be more enjoyable to eat raw than larger slices. It is easy to use and it is cost efficient. A julienne peeler may look similar to a Y-peeler but has sharp, jagged edges where you would usually find a straight peeling blade.
Throughout history, chefs, cooks and households have been julienning vegetables and fruits for special dishes, salads and side garnishes using a regular knife. In the last years, the julienne peelers have been saving them a lot of time julienning vegetables rather than using a regular knife.
If you know how to properly use a julienne peeler, and you have a reliable device, you can turn your classic recipes into artistic masterpieces. Peeling, slicing and julienning vegetables have never been so easy.
The best julienne peelers available in the market in 2022 let you cut your favourite vegetables into precise cuts, are easy to use, and designed with a comfortable handle for easy grip. High quality materials, sharp blades, and consistency in slices are important factors you should look for when you choose your new julienne peeler.
In this guide, we’re going to show you the best julienne peelers on the market that will help you improve your diet. We are also going to include a step-by-step tutorial on how to use a julienne peeler on different vegetables, including root vegetables, potatoes, and zucchini.
Julienne vegetable peeler - This high quality stainless steel julienne vegetable peeler is one of the best vegetable peelers in the market. It is designed with two ultra sharp stainless steel blades: dual julienne and standard vegetable peeler let you easily both peel and shred vegetables effortlessly. That makes it fast to create julienne strips. The stainless steel julienne vegetable peeler helps you peel vegetables in a pile of ribbons and noodles. If you are looking to zest vegetables easily, this is surely one the best julienne peelers you should buy.
Pros
* Multifunctional peeler that peels, slices, and Juliennes
* Sharp and sturdy blades recessed and protected
* Dishwasher safe
Cons
* Small space between Julienne blades may clog easily.
Have you always wanted to make thin ribbons from a carrot or zucchini for salads or side garnishes? The magic trio peelers set is the answer for your needs. One of the big advantages of the magic trio peelers set is that the sharp blades of the peelers elegantly take the skin off fruit and vegetables with a simple slide and cut thin swaths. The magic trio peelers have a flexible strong symmetrical handle that makes it very easy to use.
Pros
* Fully safe and easy to use.
* Double edged blade.
* Ergonomic design.
* Works perfectly on a variety of fruits and vegetables.
Cons
We still haven't found.
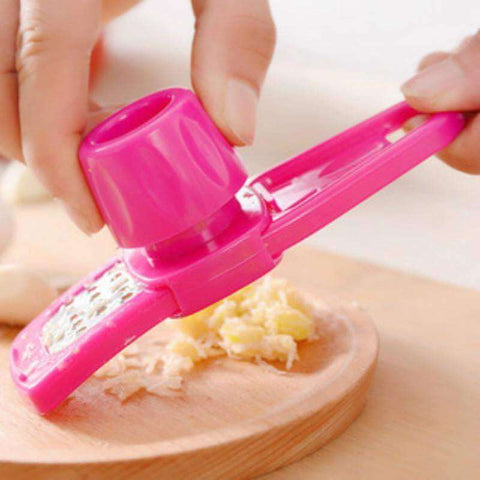
The plastic julienne tool vegetable peeler has 2 sharp blades. One of the blades is used for julienne vegetables and the other one is used as a Y peeler. This vegetable peeler has serrated teeth that shred vegetables into thin and pretty strips in a few seconds.
Pros
* Shred vegetables into thin and pretty strips in a few seconds.
* Dishwasher safe
Cons
* Could be a bit too small for some hands.
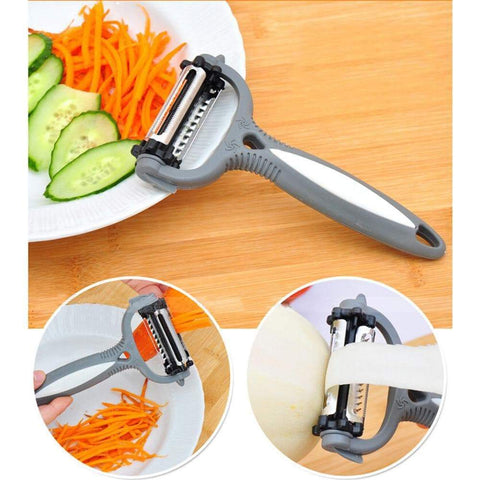
4. 3 in 1 Multifunctional Vegetable Peeler-
Peel all kinds of vegetables with this 3 in 1 cyclone vegetable peeler. The 3 in 1 vegetable peeler cutter Head is 360 degree multifunction rotary peeler includes: one hand cyclone blade handle, one the other hand there is the rotation regulator lets you select your favourite blade you want to use. It’s very easy to peel tough vegetables with the 3 in 1 vegetable peeler. The cutter head adjusts the angle for convenient use.
Pros
* Multifunctional peeler that peels, slices, and Juliennes
* No need to replace blades.
* Sharp Blades.
Cons
* May be al little difficult for left-handed users to use
5. Stainless Steel Vegetable Peeler-
This Stainless steel vegetable peeler set made from durable metal material. With 6 different types of vegetable peelers blades for cutting vegetables julienne, serrated or in a swivel way. The stainless steel vegetable peeler is easy to use, just hold the vegetable near the top, then use some pressure and begin scraping the peel down away.
Pros
* Stainless steel handle.
* High quality material.
Cons
* This peeler is one of the more expensive julienne peelers on our list.
6. Trio Peeler Set With Adjustable Blades-
Trio peeler set with one handle and three interchangeable blades. The rio peeler set helps you save a lot of space in your kitchen.The trio vegetable peeler set lets you peel vegtables for different uses. It comes with a standard vegetable peeler with a potato eye remover for peeling all kinds of vegetables easily, a large y peeler for shredding and slicing vegetables and fruits and a julienne peeler lets you make great julienne ribbons of carrot, zucchini and more easily with the julienne blade.
The plastic handle and stainless steel blades are all dishwasher-safe and very easy to clean.
This vegetable peeler blaeds are very sturdy and sharp. It allows you to effortlessly peel and julienne the hardest vegetables.
Pros
* Dishwasher-safe and very easy to clean.
* The design is appropriate for right and left-handed users.
* Very sturdy design and sharp blade allow you to easily peel and julienne the hardest vegetables.
Cons
* Some may find themself accidentally pressing the button when they don’t mean to.
If this is the first time you’re using a julienne peeler, make sure you use it correctly to avoid cutting yourself. In addition, always place to vegetable on a cutting board for support when using a julienne peeler
Each julienne peeler may have slightly different usage instructions.
It depends on what vegetable you want to make julienne strips. Generally speaking, most of the julienne peelers are used in the same way as regular vegetable peelers.
Press and hold the vegetable down firmly on a cutting board and slide the julienne peeler from the top downwards, making even slices all the way through the fruit or vegetable. Use your free hand to hold the veggie down at the top, so that you keep your fingers away from the sharp blade.
Once you reach the end, shake the slices off your peeler and return to the top, pulling the blade all the way down through the vegetable again.
Repeat this process until you’ve julienned your entire vegetable.
You can julienne various veggies like: carrots, zucchini, sweet potatoes, squash, turnips, cucumbers, beets, cabbages, potatoes and more.
For julienning potatoes, first cut the potato in half lengthwise. Then, use your free hand to balance it at a 45 degree angle on the cutting board. Run the peeler from top to bottom.
For julienning root veggies like beets and turnips, slice the veggies in half. Place the half cut side down on a cutting board and then run the julienne peeler from top to bottom. Hold the vegetable at the top with your free hand in order to make sure you keep your fingers away from the path of the blade. Repeat the process with the other half.
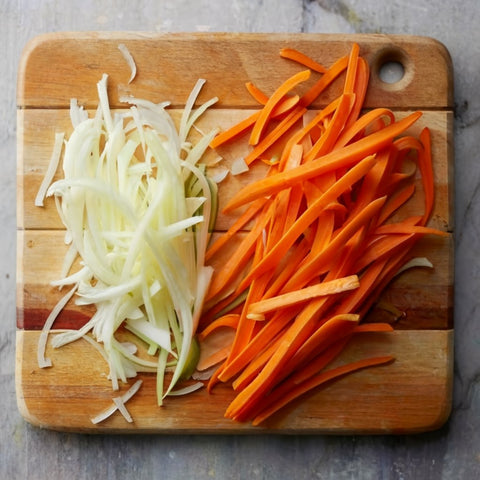
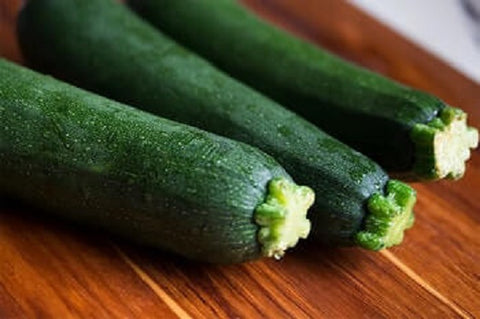
For julienning carrots and zucchini, place the veggies on a cutting board. Make sure that the cutting board is placed on a flat surface. Hold the veggie down at the top with your free hand and run the peeler from top to bottom with your strong hand.
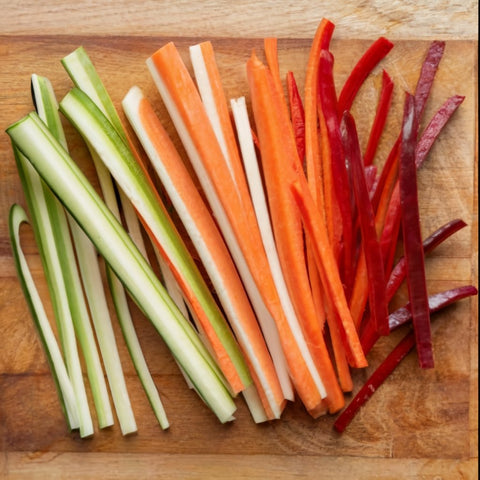
The julienne strips are usually about 2-3 inches long and 1/16- to 1/8-inch thick.
A julienne peeler lets you make julienne strips in the standard size easily. However, if you want to make the strips thinner or thicker, you can use a standard knife to trim your ribbons once they’re all prepared.
As the name states, a julienne peeler is a peeler that can create julienne strips. A spiralizer used to create long noodles. Both of these tools use sharp blades.
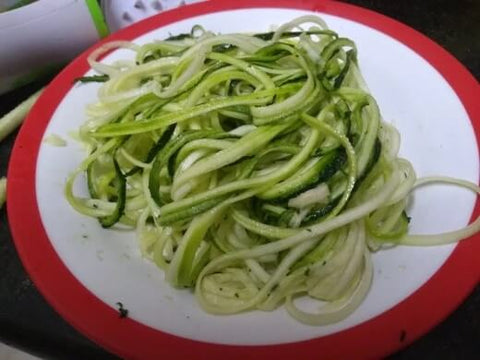
The julienne peeler and spiralizer both may be used to make zucchini, carrot and cucumber stirps.
The big advantage of a julienne peeler is its ability to create thin strips more efficiently and effortlessly. A julienne peeler can cut almost all kinds of vegetables easily. Whether it is large or hard.
A spiralizer, however, is a machine that can do the job of creating vegetable noodles and spirals automatically at the press of a button. When using a spiralizer, you have to make sure that the vegetable fits into the spiralizer. If it’s too big then you have to slice it which may take up time when you have to slice numerous veggies. The spiralizer is usually used for slicing vegetables in greater quantities like in restaurants.
A spiralizer machine is more expensive than a julienne peeler. If you just need to make a few julienned vegetables, it may be best to use a julienne peeler.
Both of these tools are easy to use. However, when it comes to cleaning, the julienne peeler is much easier to clean. You can just wash it with a little water after using it, whereas cleaning a spiralizer can be more complicated. You need to detach the components and clean each one separately. A julienne peeler is also more simple to use. If you use a high quality julienne peeler, it will last for years rather than the spiralizer that tends to have erosion in its components over time.
The julienne peeler has much more outcomes when it comes for home use. It’s a versatile tool and you can peel veggies into thin ribbons, making high quality salads and side dishes.
So which one should you buy? It depends on your needs. If you desire to have it for home use, the julienne peeler is the ultimative tool for you.
WHAT TO CONSIDER WHEN BUYING A JULIENNE PEELER
We’ve reviewed tons of different types of julienne peelers and came up with critical insights.
These are the main factors you should consider when choosing your julienne peeler:
Safety
While you should make sure the julienne peeler’s blade is sharp, you should also consider that it has some level of protection to keep your hands away from the blade.
Ease of Use
Julienne peeler is a tool that is used a lot in cooking. One of the most important things you should think about is its ease of use. Unlike vegetable slicers that come with many different types of pieces and blades,julienne peeler in most cases come with one blade. It’s important that the julienne peeler can be used effortlessly any time. You don’t need to worry about wasting time on changing blades.
Quality of Blades
Another essential thing you should consider is that the julienne peeler is made of a sharp and stainless steel blade. You need to make sure that you’re able to peel and shred vegetables effortlessly. No matter if you want to create julienne strips, peel veggies into thin ribbons, make restaurant-quality salads and side dishes, the julienne peeler needs to help you make all of these easily with as much as less effort. You should also make sure that the julienne peeler comes with a comfortable grasp handle.
1. Rinse the onion under cold water and cut off the root and stem ends.
2. Hold the onion steady with one hand and hold the julienne peeler in the other hand.
3. Place the julienne peeler at the top of the onion, near the stem end.
4. Gently push the peeler down the length of the onion, using a sawing motion. 5. The peeler will remove thin strips of the onion's skin as you move it down.
6. Continue peeling the onion until all of the skin has been removed. You can discard the skin or compost it.
6. Slice the peeled onion into thin strips or chop it into small pieces, depending on how you plan to use it in your recipe.
To sauté onions, you will need a pan, some oil or butter, and thinly sliced onions. Here are the steps:
You can also add a pinch of salt to the onions as they cook to help bring out their natural sweetness. If you prefer your onions softer and more caramelized, you can continue cooking them for a longer period of time. Just be sure to keep an eye on them and stir frequently to prevent burning.
Sauteed onions are onions that are cooked over medium-high heat in a pan with oil or butter until they are soft and slightly browned. They are often used as a base for soups, stews, and sauces, and can be used as a topping for sandwiches, burgers, and other dishes.
Caramelized onions, on the other hand, are onions that are cooked over low heat for an extended period of time until they turn a deep golden brown colour and become very soft and sweet. They are often used as a topping for pizzas, sandwiches, and burgers, and can be used to add flavor to a variety of dishes.
To caramelize onions, it is best to slice them thinly and cook them over low heat, stirring frequently, until they are deeply caramelized. This process can take anywhere from 30 minutes to an hour, depending on the amount of onions and the desired level of caramelization.
Here are a few easy ways to use sautéed onions:
Sautéed onions can be a versatile and flavorful ingredient in many different dishes. Experiment with adding them to your favourite recipes to see how they enhance the flavor.
There are many variations on sautéed onions that you can try to add different flavors and textures to your dishes. Here are a few ideas:
Try out different variations on sautéed onions to find the combination that you like best. You can also mix and match these variations to create your own unique flavor combinations.
To slice the onion, follow the same steps but make longer, thinner cuts. You can also slice the onion into wedges by cutting it into quarters lengthwise and then slicing each quarter into wedges.
It's important to use a sharp knife when cutting onions, as a dull knife can be difficult to control and may result in uneven or unsafe cuts. Always be sure to handle the knife with care and keep your fingers away from the blade.
It's important to use a sharp slicer blade when slicing onions, as a dull blade may result in uneven or uneven slices. If you are using a manual slicer, be sure to use a firm and steady hand to slice through the onion. If you are using an electric slicer, follow the manufacturer's instructions for proper use.
It's also important to be careful when handling a vegetable slicer, as the blades can be sharp and can cause injury if not used properly. Be sure to keep your fingers away from the blades and follow any safety precautions listed in the product manual.
When it comes to storing sautéed onions, the key is to keep them as fresh as possible. The best way to do this is to store them in an airtight container in the refrigerator. This will keep them from absorbing any odors or flavors from other foods, and will also prevent them from drying out. Before storing, make sure the onions have cooled completely to room temperature. It is also a good idea to label the container with the date the onions were cooked, so you know how long you have before they need to be used or thrown away. Sauteed onions can be stored for up to a week in the refrigerator and for up to 3 months in the freezer. When reheating sautéed onions, be sure to reheat them gently over low heat to prevent them from becoming tough or mushy.
Ingredients:
1 large onion, thinly sliced
2 tablespoons oil or butter
Pinch of salt (optional)
Instructions:
Slice the onions.
In a large sauté pan, heat the olive oil or butter over medium heat. Add the onion and cook for 4 minutes, stirring occasionally.
Add the kosher salt and fresh ground black pepper and continue to cook the onions, stirring occasionally, until they are golden brown and caramelized.This should take about 15-20 minutes. Taste to assess doneness and add a few pinches of salt until the flavor pops. Once the onions are caramelized, remove them from the pan and use them as desired.
The Julienne Vegetable peeler comes with dishwasher safety and ultra-sharp blades. It is designed with two ultra sharp stainless steel blades: dual julienne and standard vegetable peeler let you easily both peel and shred vegetables effortlessly. With the julienne peeler, it wasn’t that easier than now to peel the vegetables. This outstanding product can easily peel the vegetables into thin ribbons. Along with that, you can use it to prepare side dishes and quality salads. Not only that, but it can perform the entire work like a professional. Whatever the size or shape of the vegetable, the julienne peeler will help you peel the veggies in less time. You can easily peel any vegetable without worrying about cutting your fingers or hands. At the same time, anything that will get stuck to the peeler will be easily wiped off through running water or by hand. This julienne vegetable peeler lets you peel even the toughest vegetables in the easiest way. It will save you a lot of time while making your special dishes, salads or side garnishes.
Pros:
The Ceramic Y vegetable Peeler is another outstanding vegetable peeler whose width is 7.5 cm and is around 13 cm. So, it’s quite a standard-size vegetable peeler that you can use to peel vegetables into thin ribbons.
Just like you see the salads in top-notch restaurants of your hometown. This product is capable of peeling the vegetable into the same quality. One of the unique things included in the peeler is its non-stick blades and sharp ceramic edges. With this feature, you can easily peel the vegetables in minutes.
The gliding power of this vegetable peeler is outstanding with both the hard and soft texture of veggies. Hence, you will feel a versatility in the vegetable peeler that will make it easy for you to peel the fruits and vegetables without any issues.
This vegetable peeler comes in a Y shape that you can normally see in the available peelers. It comes with ceramic blades that are very sharp and can peel off the vegetables pretty easily. Thanks to the non-stick ceramic blade, you can peel vegetables effortlessly. Its blades are quite sharper than the steel. Meanwhile, it never catches rustiness and remains comfortable to use.
Pros:
5) Serrated Swivel Peeler
The Serrated Swivel Peeler, famous in the market due to its outstanding features like stainless steel blades with serrated capabilities. This peeler is quite helpful for thin skin vegetables that another peeler can’t peel. The only peeler you can use right now to do so is this peeler. It offers you a better and safe grip so that you can peel the skin of veggies in minutes without any hurdles. Apart from hard skins, this product is also good for soft or light skin veggies. The secure handling and quality handle is another amazing thing that has to be considered. You can peel the vegetable or fruit skin at different angles without any hurdles. It has an ergonomic design that makes it easy to use from both sides. It’s great for peeling soft-skinned tomatoes and other vegetables and fruits with challenging skins, such as eggplants, mangoes and grapes. Also, this vegetable peeler is easy to clean due to its dishwasher-safe capabilities.
Pros:
Learning how to julienne carrots might seem fussy, but if you like cooking with vegetables, this simple French technique will serve you well.
Julienne carrots are matchstick-sized, and they make a great garnish or addition to salads and other dishes. All you need is a julienne peeler or sharp knife—no fancy equipment required!
To julienne carrots, start by washing and drying them. Then, trim off the ends of the carrots and peel them if desired. Next, use a julienne peeler or sharp knife to cut the carrots into thin strips. Once you've julienned all of your carrots, you can use them however you like.
Sauces - Julienne cuts can be used for thickening or as a pasta sauce.
Garnishes - Julienne carrots make an excellent garnish for a variety of dishes, including soups, salads, and main courses.
Sautéed vegetables - Julienned carrots can be sautéed with other vegetables or used as garnishes.
Salads- Julienne carrots add color, flavor, and texture to salads.
Slaw - Julienned carrots can be used in place of or in addition to cabbage in coleslaw.
Soups - Julienne cuts can be used as a thickener for soups or as an ingredient in soup recipes.
Stir-fries - Julienne carrots can be stir-fried with other vegetables or meats.With julienned carrots being so thin, they cook quickly which makes them a great addition to stir-fries.
As you can see, julienning carrots is a versatile technique that can be used in a variety of ways. So next time you're looking to add a little something extra to your meal, give julienning a try!
If you have a julienne peeler, julienning carrots is a breeze. All you need to do is peel the carrots and then run them along the julienne peeler to create thin strips.
To julienne carrots with a peeler, place a large carrot, long-side-down, on a flat surface. Grip the carrot with one hand and, with the other hand, hold the julienne peeler at the top of the carrot. Then, simply run the julienne peeler down the length of the carrot to create thin strips. Repeat with remaining carrots.
If you don't have a julienne peeler, don't worry—you can still julienne carrots with a knife. The key is to start with a sharp knife and to cut the carrots into thin, even strips.
To julienne carrots with a knife, start by trimming off the ends of the carrot. It’s a bit more time consuming, but you’ll get to impress with your fancy knife skills. Next, cut the carrot in half so that you have two shorter pieces. Then, place one of the halves, flat-side-down, on your cutting board.
With a sharp knife, carefully make thin slices down the length of the carrot, being careful not to cut yourself. Once you've sliced the carrot into thin strips, you can then julienne them by cutting the strips into smaller matchsticks. Repeat with remaining carrots.
Now that you know how to julienne carrots, put your new skills to use and try them in a variety of dishes! Julienned carrots are perfect for soups, salads, slaws, and stir-fries.
WHAT SIZE IS JULIENNE CUT?
A julienne cut is usually 1/8-inch (3 mm) wide and 1 1/2 to 2 inches (4 to 5 cm) long, but can vary depending on the size of the vegetable being cut.
WHAT OTHER VEGETABLES CAN I JULIENNE?
In addition to carrots, julienne cuts can be made on a variety of vegetables, including potatoes, zucchini, and squash.
PREP TIME: 5 minutes
SERVINGS: 4 servings
Ingredients: 4 large carrots.
Instructions:
1. Wash and dry the carrots. Trim off the ends of the carrots and peel them if desired.
2. Use a julienne peeler or sharp knife to cut the carrots into thin strips. Hold the thick end of the carrot and drag the julienne peeler from the thick to the thin end. Alternatively, use a sharp knife to cut the carrots into thin matchsticks.
3. Julienned carrots can be used in a variety of dishes, including soups, salads, slaws, and stir-fries.
]]>Adopting a meat-free diet has now become much easier and accessible for everyone.
The Demand for meat-free food increased by 987% in 2017 and going vegan was predicted to be the biggest food trend in 2018.
There are around 1.6 million people in the UK who are currently vegan in 2022.
The number of vegans in the US has increased by more than 500% since 2014.
In 2021, it was estimated that the plant-based meat industry is worth $939 million due to its rising demand in restaurants around the world.
3% of the population of Great Britain are vegan in 2022. For comparison, just 1.16% were vegan in 2019. This is an increase of 87.5% in just 3 years.
Currently, 14% of adults in the UK (7.2 million) are following a meat-free diet.
There are different reasons consumers decide to switch to vegan diets. The main reasons are: taking a stand against the mistreatment of animals, health reasons in order to increase the number of fruits and vegetables they consume to stay healthy.
This new vegan demand impacts the food industry professionals throughout the supply chain. Restaurants, grocery stores, food manufacturers, cooking utensils producers, ingredients, and processes have been altered so they can better cater to vegan consumers.
Prepare the oven
As with any baking project, preheat your oven to 400 degrees Fahrenheit as required.
Prepare the potatoes
In the meantime, the oven is heating; it is time to begin preparing the potatoes. Grab the vegetable brush your family member gifted you and use it to scrub and apply cold water to the surface. Use a julienne peeler to remove eyes you may see that will compromise the baking consistency once the potatoes are in the oven.
After you have prepared them, use the kitchen towel to pat them dry.
Now use the fork to poke holes throughout the potatoes’ surface. The holes will provide even cooking and prevent the potatoes from exploding inside the oven from internal baking.
Wrapping the potatoes
Before placing the potatoes in the oven, wrap them in aluminum foil. The foil would result in softer and crispier skin retaining the heat underneath the foil.
Remember to place a baking sheet liner on the lower rack of the oven. Suppose you decide not to wrap the potatoes in aluminum foil. In that case, they may start discharging natural starch and sugar present inside the potatoes. The baking sheet will catch any dripping.
Now place the sweet potatoes in the middle rack. If you are feeling adventurous, have it be a combination of wrapped and baked potatoes. The delicious sweet baked potatoes will be ready soon. However, they may take up to an hour if they are large in size.
Assess the potatoes
After enough time has passed, take them out of the oven and, using the fork again, poke them to assess the baking stage. If the fork comes out without any flesh residue, the potatoes are done. You will not need to apply much force if the potatoes are raw inside.
Season the potatoes
After you have skinned and potatoes’ flesh is on display, you may season them. Use kosher salt and cinnamon to season. Other seasonal varieties include margarine or crushed black pepper.
The baking time of sweet potatoes depends on the quality and eating of the oven. On average, sweet potatoes take an average time of 45 to 50 minutes to bake at 400 degrees Fahrenheit. Additionally speaking, the internal temperature of the cooked potatoes should register from anywhere between 205 and 212 degrees Fahrenheit in the thickest part of the sweet potatoes.
Conclusion
Now that your sweet baked potatoes are ready, it’s time to munch. You can eat them as sides or as a whole meal with skins. The skins of the sweet potatoes are jam-packed with potassium and fiber, so don’t shy away from eating them. Fair warning: the baked skin is tasty but exceptionally chewy.
Vegetable choppers have been in high demand in the market. Due to the fact, it provides a sense of easiness to chop the vegetables in less time. But, the huge amount of choppers made it harder for anyone to decide on one product that is good to buy. In addition, there are today multifunctional kitchen gadgets stores that offer vegetable slicers with various chopping blades. So, how can you select the best vegetable chopper suitable for your needs?
We have created this article where you will get to know about several best vegetable choppers. Using any of them will help you a lot. So, let’s talk about them.
Mandoline Slicer Cutter Chopper and Grater
Our first product is the Mandoline Slicer Cutter Chopper and Grater. In general, it’s an all-in-one product that can provide you the services of chopping, peeling, washing, and many more in one place. Besides that, you can cut any fruit and vegetable in one size or shape with this product.
It has four different blades whose task is to cut the vegetables in different shapes. Hence, you have the option to choose what you love the most. Meanwhile, all four blades are replaceable. Besides that, it has a hand holder, vegetable peeler, and a drain basket as well.
FDA has approved this product due to the fact they use eco-friendly material. So, you can cut the vegetables most hygienically. To replace its blades, you have to slide it into the slot. Meanwhile, it offers safety with its locking and snapping capabilities.
Pros:
Cons:
The second product on the list is Fullstar Vegetable Chopper. Here, you will be happy to know that this chopper comes with seven different blades that encompass various designs and shapes of cutting methods for you. Therefore, it will be interesting to create salads of different shapes or cut them for cooking purposes without any hurdles.
Within the blades, you will get two different sizes of blades. One blade is ideal for fine chopping, while the other is to cut veggies into medium size. Also, you can use both of the blades to cut the garlic, chilies, onions, tomatoes, etc.
Besides that, there are three different types of other blades whose primary task is to cut vegetables of all kinds. The list of blades is coarse grater, julienne cutter and straight slicer.
Pros:
Cons:
This product comes in two different sizes, including smaller and bigger. With the smaller chopper, you can easily cut the vegetables into tiny or medium size pieces. On the other hand, the bigger chopper is good for chopping all kinds of boneless meat.
Its design is quite different compared to other choppers we have talked about. First, you will see a strap over the Vegetable chopper. With the help of the hands, you have to pull the strap to let the blade rotate and push it back to its place. This will create a rotatory motion that will help you to chop the vegetables or anything else easily.
Pros:
Cons:
Our last product on the list is the Safe Slice Upright Mandoline. This vegetable chopper is in demand due to its unique shape and method of vegetable chopping. One of the best things about this product is that you don’t have to change the list of blades available in the product manually. It comes with a thickness adjustment feature to press the handle and rotate the regulators to adjust the cutting shapes. With this feature, your hands will remain safe and dirty-free.
The functioning of this chopper is unique due to its design. All you need is to push the handle that is on top of the chopper to cut vegetables. Moreover, it comes with compact storage, a Julienne knob, a Matchstick knob, and a slicing dial.
Pros:
Cons:
What to Look for in a Food Chopper
At the time of buying the Food chopper, a few important things you have to consider.
Blade Options:
First of all, you need to look for the number of blade options offered by the company in their product. Also, the blades need to be interchangeable. This will help to chop vegetables in different shapes and sizes as per your needs.
Type of Chopper:
You will see different food chopper types in the market. All of them come with a unique and special feature compared to others. Therefore, you need to define your needs and select the vegetable chopper accordingly.
Safety Functions:
People use Vegetable choppers to do it safely and instantly. Therefore, you also need to prioritize the safety functions whenever considering buying a vegetable chopper. For example, the base of the chopper shouldn’t need to be non-skid. Also, it should come with a secure lid.
Types of Food Choppers
To suit your budget and needs, different types of food choppers are available in the market. For your convenience, we want to tell you that all types come in two categories, and we will talk about them below.
Electric: The electric food choppers tend to be more functionality specialized and come in smaller sizes. In such choppers, you need electricity to chop food by spinning the blades. It comes with a button that you need to push to start the chopping. This type of chopper is expensive.
Manual: The manual choppers are quite affordable than electric choppers. Why? Because it doesn’t come with a battery or machine that runs with the help of electricity. Here, you have to perform the chopping with your hands.
Some manual vegetable choppers come with a hand-slap design to slap or press to spin the blades. While, other mechanisms of manual vegetable choppers use pull-cord, level press, or turning mechanism to cut vegetables.
Conclusion:
Are you looking for a Vegetable Chopper? If yes, then you have to read out the whole article. We have discussed the four best vegetable choppers for you. All of them are good in quality, and you don’t have to research further in the market to choose the best for yourself.
]]>When considering cabbage, the best thing you can do is to boil. Why? Because eating boiled cabbage has ten times better health benefits compared to oil-cooked. Apart from that, boiling the cabbage is a lot easier than cooking it with oil. And also, boiling the cabbage can keep the flavor, which brings outstanding taste.
Although boiling cabbage has many benefits, we still need to learn about how to boil it perfectly? For that purpose, we have created this article where everything will be mentioned for you in detail.
Step 1 (Cutting the Cabbage):
The first step starts with cutting the cabbage into pieces. For that, you need a slicing board and a sharp knife or a vegetable slicer to piece it into sections.. Make sure to slice the pieces as tinier as possible. However, make sure to follow the safety measures because a sharp knife could be dangerous for your fingers. You can either use a cabbage peeler for safety cutting. After cutting the cabbages, now, you have to wash them properly.
Step 2 (Prepare the ingredients):
You are boiling the Cabbage; therefore, it’s good to include additional ingredients into the water to bring more taste to the cabbage. For that, you have to consider ½ teaspoon salt, melted butter (3 tablespoons), Black Pepper.
Step 3 (Prepare Boiling Water):
The most important step for boiling cabbage is to prepare boiling water. For that, you have to take 250ml of water on a pot and put it on the stove. Make sure to never leave the pot without covering it with a lid. Also, it’s necessary to keep the measurement as accurate as possible.
Step 4 (Add cabbages):
After the water starts boiling, the next step will be to add Cabbage into the water. Make sure to spread all of the cabbages into the pot so that the vegetable would equally tenderize.
Step 5 (Lower stove heat):
You have to tenderize the cabbages. Therefore, you need to lower the stove's heat and let the cabbage boil for at least 15 minutes. After 15 minutes, check out whether the cabbage has perfectly tendered or not. If not, then leave it for another 15 minutes.
Step 6 (Add other ingredients)
The cabbage has tender quiet ideally; now, it’s the time to bring the flavor. That’s where you have to add Salt and pepper into the cabbage. This will give a unique taste to the cabbage that you will love. Now, Dish out the Cabbage, and add the melted butter into the cabbage for a better texture and enhanced taste.
No matter how you cut your cabbage. Whether it is in wedges or in strips, you should boil it between 10-12 minutes until it is fork-tender.
When you boil cabbage, it contains lots of benefits. Like, minerals are essential for our body, and the boiled cabbage contains all of the vital minerals. So when you boil it, the beneficial minerals remain in the cabbage.
Conclusion:
Cabbage can provide lots of benefits if you eat it boiled. However, boiling the cabbages needs a lot of practice or experience. For that reason, we have created this article guide where you can get adequate information to boil cabbages.
]]>A microwave oven heats or reheats cheeses and butter unevenly. Some spots may be at the ideal temperature, while the remaining spots are cold to the touch. Similar can happen to a block of butter as well. An overly beaten or non-ideal cream cheese state will deflate the batter or the icing.
Today, we learn how to soften cream cheese in warm water with the following steps:
Many people choose to leave it out in the open without microwaving or bathing it in water. They prefer the traditional process to maintain the taste and integrity of the cream cheese block. However, it is advised if you choose to leave the block out in the open, slice and dice it. Otherwise, it may take up to an hour to soften. You can use a vegetable slicer for easy slicing.
Be very careful when it comes to softening cream cheese quickly in a microwave oven. A well-softened cream cheese still feels cold to the touch and leaves a fingerprint mark. If you are hesitant to microwave it, the remaining methods should work just fine.
]]>A silicone muffin pan is a very versatile addition to your bakeware collection. It is primarily for baking plate-sized savory and sweet pastries. The most helpful feature is that silicone does not warm up certain doughs and flours as metal pans. Thus, the feature does not burn when you are baking delicate French and Britishpastries. It is also a beneficial tool to deliver a rising golden top layer of bread doughs.
The silicone muffin pans are very easy to use too. There is no need to scrap the molds to release your baking project. Scraping compromises the integrity and composition of a baking project. Some scraping action ruins the baking surface and makes it uneven. It might also make it difficult to stack layers as they might collapse internally.
Using non-silicone pans may result in bakers using tiers to support their projects. Tiering is a complicated process for professional bakers, let alone domestic cooking enthusiasts. It also makes icing the project a lot more difficult. It may result in uneven iced layers, which is not the aim of any baker. The entire situation can be avoided by learning how to use a silicone muffin pan.
Silicone pans also make it easier for baked goods to pop out of them. They do not stick to the surface at all. All you need to do is push from the bottom of the pan, and goodies will pop right out.
Aerosol cooking spray will make your baking life a lot easier. It will maintain the structure of your baby cheesecakes, muffins, or minute donuts that you intend to bake today. You can also grease the pans using room temperature butter or vegetable oil to achieve the same results. However, never grease the pans with olive or extra virgin olive oil. It’s because olive oils have a lower boiling point and cannot sustain heat. As a result, your muffins or whatever you decide to bake in the silicone pans will turn out very bitter.
Silicone muffin pans are a great tool to store mise en place before cooking. The French term consists of collecting all the necessary herbs and spices required before you start cooking. When you begin gathering spices, at the same time your pans are on the stove, the oil may overheat, or your custard may start to curdle. Therefore, it is crucial to divide the spices and seasonings you intend to use. These include cyan pepper, cumin powder, freshly chopped herbs, kosher salt, and pepper into the muffin pans into silicone muffin pans.
Well, the Silicone muffin pans have been designed in a way where they help release the muffins once they are fully baked. But as they are flexible and soft in texture, make sure you follow some precautionary measures for baking them successfully. Check the steps below to see how you can use Silicone Muffin Pan:
Now without wasting any time, let’s talk about a few basic pros and cons of baking with silicone:
Below we will be discussing a few of the important tips which you need to follow for a successful baking experience. Have a look:
How to use a silicone muffin pan is not a complicated process. There are diversified tools that are used in baking and cooking preparation. Silicone muffin pans are necessary to bake delicious self-rising muffins and pastries that will make you talk of the town in your social circle.
]]>Although there are different ways to make sweet potatoes, most people would love to eat them in a baked form. However, many people are unaware of the fact that how long sweet potatoes should be baked? That’s what we are going to talk about in the article.
Well, most of the questions that we have read on the forums and blog comments refer to the same thing as how long a sweet potato has to be baked at 400 temperature. In general, you would easily bake the sweet potatoes for 45 minutes to 1 and a half hours at 400.
But, the primary question raised here is that not every sweet potato comes with the same shape and size. Yeah, it’s true, and that’s the primary reason you can quickly initiate the timing at your convenience. We have mentioned 30 minutes to 1 and a half hours because different sizes and shapes of sweet potatoes can be baked promptly within a similar period at 400.
We will be telling you about the time that is required for different types of sweet potatoes for your convenience. Starting from the smaller one, so you have to check it after 30 minutes. One hour is possible for a medium-sized sweet potato to bake. In the end, the one that comes with a large size and shape has to be baked for at least one and a half hours or less.
For storing sweet potatoes, there are three simple steps that you should consider. First of all, you need to wash out all the sweet potatoes to remove the dirt and other particles attached to them. Remember, doing this refers to eating a hygienic product and remaining safe from any health issues.
After that, the second important thing is to poke the sweet potatoes. The reason for doing this is because the steam or heat a sweet potato gets could burst it. Also, poking the sweet potato will help to bake it evenly, and there should be an escape from the air. With the help of a fork, you can poke the sweet potato.
In the end, you have to bake the sweet potatoes for at least 1 hour by considering the 400 degrees Fahrenheit. In addition, sweet potatoes come in different sizes and shapes; therefore, you have to increase or decrease the baking time accordingly.
Well, it depends. While some people enjoy the sweet potato skin, some people prefer to peel it off. Baked sweet potato is extremely easy to peel once baked, you can use a vegetable peeler or a regular knife to do that.
The reason you should eat baked potatoes is that they contain the full amount of minerals after baking. Another reason to bake is that you can make it with plenty of recipes. In the end, baking the sweet potatoes helps you to prepare them quickly.
Conclusion:
Sweet potatoes are one of the most common and favorite vegetables that every single person loves to eat a lot. When you bake the sweet potatoes, it can help you prepare different types of recipes that are good in taste, etc. This article discussed everything about baked sweet potatoes; therefore, read out every information to get a better idea about it.
]]>If you have been peeling and chopping garlic by hand and knife, you know the smell of garlic cloves on your fingers can linger after you have cooked meals. Presses have the big advantage that many of them can be used without peeling the garlic cloves first. They come in a number of styles and shapes. If you use garlic a lot in your cooking, it’s a sure bet that one of these tools will become one of your favorite kitchen gadgets in your kitchen.
Here are the best garlic presses:
Stirring, beating, and lifting condiments is not a difficulty anymore. This garlic presser comes with an innovative design and drops minced cloves directly onto the frying pan. It is made of stainless steel to finely mince garlic cloves for sauces and stock making. This may be the only tool you have been missing to increase your culinary capabilities to surprise your family members or friends.
This garlic presser comes with comfortable handles and a circular mincing plate that does not compromise the flavour. In addition, the product does not slip and is designed for durable use. All you have to do is press the garlic cloves on the counter, apply gentle pressure to them, and the cloves will mince instantly.
This garlic presser is for garlic lovers. It adds authentic garlic seasoning to tofu, fried chicken, pasta, noodles, and fish meals and is highly recommended for domestic use. The garlic presser is incredibly easy to clean. Simply let it rinse its water before giving it a rough wash.
Some cooks prefer to use garlic presses because of the odor factor. The smell from garlic does not go away easily. The Garlic Presser Rocker is easy to handle and delivers finely chopped from the kitchen counter into the frying pan. Additionally, it will instantly introduce convenience to your cooking.
]]>Before starting to talk about the products, it’s better to understand the things you need to consider from a good quality onion chopper.
Warranty: Warranty should be your main priority at the time of selecting the best onion chopper. Why? Because chopping the onion is a tough task that puts a load on the machine. Hence, its warranty has to be for an extended time.
Safe for Dishwashing: Ensuring the dishwashing safety of the onion chopper is another important thing as you have to manually remove the components for washing and drying purposes every time.
Good quality Containers: The containers are the place where the chopped onions tend to store. Therefore, its quality build needs to be your optimal priority throughout the time. In addition, it’s good to consider the ABS plastic material as it provides food safety and BPA-Free features.
Blade Types: Blade type needs to be optimal as it plays an important role in chopping onions. It would help if you went with the one that is adequate for onion chopping but also julienning. Try to ensure that the blades contain safety features.
Electrical vs Manual: Manual Choppers are better for users who want a pretty easy to operate chopper. On the other hand, the electrical ones come with advanced features to bring convenience to your life. Hence, you have to consider the one that fits your needs and desires.
Kitchen Master Mandoline Slicer:
Kitchen Master Mandoline Slicer is an outstanding product that costs around $35, which can pretty much handle all of your chopping needs, whether it’s onion or any other vegetable. One of the major reasons you should purchase this product is because it can make your life easy and faster. Meanwhile, the taste of the onion will remain the same. Lastly, it can cut every type of vegetable and fruit.
Pros:
Cons:
Mandoline Slicer Cutter Chopper and Grater
First of all, the product comes in a racket shape. You can resemble it with the lemon squeezer that contains the handles and a medium square size squeezer. You will get the blades in the same area with handles that you need to press for onion chopping. Wheat straw and high-quality food-grade are used for the creation of this product. Meanwhile, it has a safe design.
Pros:
Cons:
This vegetable chopper's design is meant to be ergonomic and comfortable to help you chop all kind of veggies quickly. You have to operate this vegetable chopper manually. Besides that, it comes with 7 interchangeable blades where you can slice, chop, and julienne without any hurdles. Also, it has a collection tray where the chopped onions will be stored. Heavy-duty stainless steel usage in this product makes it rust-free.
Pros:
Cons:
First of all, this is a manual vegetable chopper that can also chop the fruits for you. The material used for this product is plastic; however, the type is PP. Meanwhile, it has eco-friendly attributes that make it an ideal product to use by anyone. Beyblade type manual procedure is required to spin the slicer inside the container to chop the onions.
Pros:
Cons:
The Safe Slice Upright mandolin is a compact size chopper for onions that saves a lot of processing space. The safety features are outstanding as you have to push the handle for chopping the veggies and fruits. Meanwhile, it is made up of food-grade material. Furthermore, the blades are hidden, making it the safest option along with convenience and stability due to the collapsible feet.
Pros:
Cons:
Some appliances are mandatory to include in our kitchens in recent times. Among those appliances, Online choppers are the ones. Why? because it offers the convenience of easily chopping the onions without making yourself cry and remains secure.
As the product has a lot of importance, it’s availability in the market is in a considerable amount. Due to these reasons, finding the right one would be hard for you. However, we have included 5 best onion choppers in the article for you. Buy any one out of them as all of the products offer you value and good quality.
]]>Buying a watermelon slicer is not a normal process. Therefore, you have to consider different things at the same time for better results. Here, we would like to cover the major factors that you should look at when purchasing.
Functionality: Sometimes you are out of time, and sometimes you are tired off; hence, the various functionalities in a watermelon slicer would make the situation easier for you. So, you should consider this factor all the time whenever buying a slicer.
Usability: The usability tends to be higher in a watermelon slicer as you would not remain satisfied with a single type of cutting. Therefore, it has to be indifferent to slicing shapes along with offering ease.
Size: Watermelons are larger; therefore, you should go with a type of slicer that can easily fulfill cutting large size watermelons without any hurdles. Also, the slicer with a larger size should be able to cut smaller size watermelons.
Material: The material used in the watermelon slicer has to be rust-free and of good quality. For that, you should go with the ones that are stainless steel.
1) Extra-Large Watermelon Slicer
First of all, the watermelon slicer we are talking about comes with sharp blades that pretty much make the cutting of watermelon easier for you. Apart from that, the material used in the manufacturing of this product is stainless steel. Here, you will be happy to know that stainless steel is the best material type that remains long-lasting with rust-free features.
For user convenience, it comes with handles where you can pressurize your hands to cut the watermelon without worrying about slipping issues. At the same time, it cut down the whole watermelon in one go.
Pros:
Cons:
The watermelon Windmill slicer has a thick and adjustable blade that you can use depending upon your needs and demands. Hence, the cutting process will bring up versatility for you. It is designed with unique rounded edges and non-sharp blades in order to protect your hands. It is even safe for kids. The manufacturers have taken care of the sanitary and safety for you. It's made up of stainless steel of 304 grade, which is quite durable. Meanwhile, it comes with cyclone blades that are funny and fast for cutting watermelons.
Pros:
Cons:
3) Watermelon Slicer And Server
The unique design and cutting blades are the major reasons you should consider this product to cut watermelons. Apart from that, it’s designed in a way that ensures the perfect hygiene of watermelon as you won’t have to touch it while cutting.
The cleaning process is a lot easier and doesn’t even require the hands to clean the leftover watermelon particles. Simply the splash of water will do its task. Also, it has firm gripping that makes the cutting procedure accurate and outstanding for you. This watermelon slicer helps you both slice and serve watermelon with its tongs functionality.
Pros:
Cons:
Watermelon slicing is a hassle and requires perfection. However, a person who is not aware of cutting it would end up cutting the finger as well. In this article we have reviewed the best watermelon slicers available in the market.. All you need is to read about them and select one for yourself.
]]>So,what is the ideal way to freeze cabbage? That’s what we are going to talk about in this article. Everything will be defined in steps; therefore, we need your proper attention.
Step 1 (Sorting out the things you need)
The first step starts with gathering all of the things that are important in the procedure. For that, you need a julienne peeler or vegetable slicer, cutting board, freezer bag, stockpot and bowl. After you complete this step, follow the next one.
Step 2 (Wash Cabbages):
Washing out the cabbages is very important for you since they contain bacteria that can go away after properly washing the cabbages. However, before that, you have to remove the first outer layer of the cabbage and then properly wash it.
When you properly wash the cabbage, the next thing will be to soak it for 30 minutes, at least in cold water. Soaking the cabbage into the water will create some moisture that you need to shake off, and then let the cabbage dry.
Step 3 (Cutting the Cabbages):
The third step will be to cut down the cabbages into pieces. Why? Because freezing the cabbages in raw form is not a good idea. Also, cutting down the cabbages helps you when you are not sure how to use them. In this way, it is easier to slice them into desired shapes and sizes.
Step 4 (Boil the cabbage to kill bacteria):
You have washed the cabbage to kill or remove the bacteria out of it. However, it’s still a good thing if you boil the cabbage to kill bacteria. For that, you need to pour a pot of water and put the cabbages inside. Next, turn on the stove and set it on high flame. Once the water starts boiling, dish out the cabbages for at least 2 minutes.
Step 5 (Cool down the Cabbages):
Stop the cooking process by putting the cabbages into ice water. Why? Because you want to use it for the future. Therefore, it’s not essential to cook it properly.
Step 6 (Freeze it):
After completing all of the above procedures, it’s time to put the cabbages inside the freezer. First, however, make sure to put it inside the freezer when the cabbages are adequately cooled down. Also, make sure that the cabbages are perfectly dried. You can use a cabbage peeler to easily slice them thinly to ribbons.
When cabbages dried, the next step is to wrap them on the frozen bag airtight. Now, put it inside the freezer and use it for a more extended period.
Conclusion:
Cabbage is a popular vegetable thanks to its taste and health benefits. Therefore, the demand for this vegetable is higher in the market. At the same time, people are curious to know about the adequate freezing of cabbages to use it for a more extended period. In this article, we have discussed a thorough guide that will help you to store the cabbages for a longer time by freezing them.
]]>Onion rates go up and down depending upon the conditions and market value. Therefore, it’s an outstanding decision if you buy onions in a considerable amount and store it to safely use for longer periods. But how is that possible? That’s what we are going to talk about in the article.
Whole Onions
When you visit the huge supermarkets to fill your pantry and fridge with delicious food items, you admire the view of onions stacked together in a pile. Unlike such a sight, onions must not be left inside the fridge if they are in their unpeeled state. Whole onions shall be stored in a dry and dark, and well-ventilated room.
Do not store them in bags made of cloth or plastic boxes. You can use mesh bags or boxes with holes cut out, so they remain aerated. The onions must begin to absorb moisture, or they will decay at a speeding rate.
Keep scrolling to know more about how to store onions.
Peeled onions
After you have washed your eyes from peeling onions since you could not stop crying, it is time to store them. You can use a vegetable slicer, mandolin dicer, or a julienne peeler to peel them quickly. The best way to store the peeled onion version is straight into the refrigerator in an air-tight container. Additionally, how to store onions with an air-tight container comes with two benefits.
By placing them in an air-tight container, you stop airborne bacteria from entering the bowl, which may assist in onion decay. Moreover, the air-tight container prevents the smell of raw onion from spreading inside the refrigerator. Do not use plastic containers, or the smell and taste of raw peeled onion may transfer onto them.
Cooked onion
Mostly all recipes begin with chopped onion being sautéed in olive or vegetable oil. Chop onions using a vegetable chopper. You can use a julienne peeler or a mandolin dicer as well. Though they may have been simmering at high temperatures, they are still prone to bacterial decay. After the onions have cooked to your ideal state, quickly transfer them to the fridge in an air-tight container within two hours of cooking.
The sautéed onions stay at a temperature of 40 to 140 degrees Fahrenheit. This is referred to as that danger zone ideal for bacterial growth on the onion surface. Cooked onions can be stored in the fridge for at most five days.
Chives
Since chives carry more water content, they are delicate and have a limited shelf life. Therefore, they must be used within a few days of buying. They can be placed roots down in a jar filled with some water. Chives can also be stored in a loose plastic bag inside the fridge. Chives do not need to be diced with a vegetable slicer. Use quick and straightforward dicing motions.
Chives also stay usable if stored in a sealed plastic bag which will retain moisture inside the bag for at least a week. Whenever you wish to use chives, grab them straight from the fridge and remove them from the plastic packaging. Dice them finely and add them straight to the pan.
At room temperature, experts say that onions tend to last in between 2 to 3 months. However, it's important to understand that the same onion would not be edible if you put it at room temperature for one month.
The difference of time is dependent upon the area you choose for the storage purpose. Let's say you have dark, cold, and cross-ventilation space, then the onion will remain good in taste and quality for up to 3 months. However, having a location with higher humidity and hotness will make storage troubles for the onions.
Another option that most people consider is to store the onions in the refrigerator. The reason people consider this method is because of the weather conditions. If you have sliced onions and then store them in the refrigerator, the onions will easily last for up to 10 days. On the other hand, peeling the onions and then storing them in the refrigerator will last for around 14 days. If you want to maintain the freshness and taste of onions, then you can use the airtight container, and then store the onions into the refrigerator. Besides that, cooked onion can last up to 3 months in the refrigerator.
If we talk about the raw onions, it can last in the freezer for up to eight months. You can use the plastic wrap or aluminum foil for the purpose of storing it air tightly. Moreover, the use of freezer bags are also ideal. Apart from that, cooked onions can be stored for up to 12 months in a freezer if you put it inside the freezer bag or an airtight container.
In general, you can store onions in different processing stages including pickled, cooked, diced, or peeled. All of the methods are different, and the long lasting effects are also diversified.
Starting from Pickled, so you can store it for at least six months without any hurdles. All you need is to put spices, sugar, salt, and vinegar into the onion and preserve the mixture in a jar.
The second option available for you is cooked onions, which you can easily use for at least 5 days when put into the fridge. Also, putting it inside the freezer will extend its durability for approximately three months.
The third option available to store the onions is possible by dicing, cutting, or slicing the onion and then storing it into the fridge or freezer. It can last up to 10 days inside the fridge without any hurdles. Also, putting them into the freezer will extend the time period to more than six months. Slicing the onions properly is possible with the help of a mandoline slicer or vegetable slicer. Why? Because it will never cause dirtiness and give pleasure to your eyes.
In the end, peeled onions will keep their quality and taste better for up to 14 days without any hurdles. After that, you can peel the onions easily with the help of a julienne peeler.
Conclusion:
Onions are one of the essential ingredients that we tend to use in our cooking recipes. Therefore, it’s durability and long lasting effect is mandatory for everyone. That’s the reason, we have created this article where you will get to know about the list of ways to store onions.
]]>You will need the following items if you are learning how to grease a cake pan properly:
To properly grease a cake pan, begin with tearing a square or circle-shaped parchment paper. However, before that, use room temperature butter or generous droplets of cooking oil to grease the pan. Next, drop the emollient fat in the center of the pan and swirl it around.
The first step is relatively simple if you use a cooking spray. Hold it from the opposite direction and twist and turn the cake pan until it is adequately coated. Be sure to get the sides, corners, and bottom of the pan. Next, place the pan on top of the counter and spray it over.
Now that you have greased your baking mold, it is time to flour it. Grab a generous amount of flour in your hand or sieve it over the baking pan. This is a very messy process, so wear an apron and work near or over the sink if you can. If you are sensitive to flour residue in the air, wear glasses too.
Begin flouring the pan by shaking your wrist over the mold. If you are worrying over uneven flour distribution, it’s okay. It does not need to be perfect. You are only required to cover the pan with flour. Once you have successfully performed this action, turn it upside down and hit the bottom of the mold to release the excess flour.
Now it is time to line the baking pan. You may think this step is a waste of time, but it is undoubtedly worth it when your risen dough just pops out with the help of parchment paper. The actual challenge is cutting the parchment paper according to the shape of the baking pan.
Grab your scissors; it's time to get to work.
Begin with laying down the mold or cake pan on top of the parchment paper. You can use kitchen weights to ensure it does not slide around. Next, trace the shape of the pan with a pencil or using the baking mold outline. Set the mold aside and cut the parchment paper. It should fit perfectly.
Now grab your cake pan and place it on the counter. Grease and flour the pan if you have not already. Lay down the prepared piece of parchment paper. Now dump the prepared cake dough on top of the parchment paper and place it in the pre-heated open.
After you remove the prepared cake dough from the oven, grab the parchment paper edges, and it should slide out. Do it slowly.
Now place your dough on a cooling rack to enjoy later.
Double greasing that involves butter and parchment paper is a God-sent technique that ensures the baking project does not scrape or fall apart. However, if you are using cake pans whose base slides off, double greasing is not a necessary step.
]]>
Among different measuring tools for cooking, we have the name of measuring spoons. These are a staple in many kitchens, especially those who are baking enthusiasts. Measuring spoons have numerous advantages for the daily user.
Dry measuring spoons are very useful for measuring dry ingredients in baking. It eliminates guesswork and ensures your baking sponges are airy and lightweight. Measuring spoons are also handy for measuring liquid ingredients. The cup-and-spoon set assists in transferring liquids from one container to the other quickly with minimum spillage.
Measuring spoons promote efficiency. Minimum ingredients are wasted. Measuring spoons also create a cooking/ measuring pattern once the cook has gotten used to them. Unlike other measuring tools, measuring spoons are very inexpensive. They are usually manufactured out of plastic that is suitable for kids to use and learn from.
You cannot easily measure the liquids within similar dry measuring cups because there is a difference in the measurement between the liquid ingredients and the solid ingredients. Therefore, it is important to get some cups for the measurement of liquids when purchasing dry or digital measuring spoons or cups.
Liquid measuring cups are available in plastic or clear glass material with which you can easily check the quantity of the liquid that is poured into the cup. If it is difficult for you to measure with this spoon, you can use the weighing scale, which is 100% accurate.
You can use the slotted spoons for retrieving the solid ingredients straight from the cooking pot. It can even be used for preserving the liquid, which you can, later on, use as the measuring kitchen utensil.
They generally come with a handle which has a hole in its middle, which serves as the weighing tool. You can even use it for serving spaghetti. Hence for measuring the serving size, this is the perfect measuring tool for you.
Long Spout Measuring Cup
We have been taught to assess the many stages in cooking using our sight and touch. However, this may result in burnt fingers or stings from scorching oil splashes. A spouted measuring cup is a helpful measuring tool for cooking that provides even pouring.
Specific meat cuts cook perfectly at the correct temperatures. Unless you wish the guests to suffer from food poisoning, a long spout measuring cup will ensure universal coating and curing for frying or baking purposes. A long spout cup is handy for pouring cake and muffin batter into the stencils. Its capacity of 1000 milliliters will result in quick and efficient pouring.
It completely removes dated techniques to assess the height of poured batter. Instead, it makes the baking preparation process a lot easier. The measuring cup is manufactured with polypropylene plastic, making it durable and safe for use in the kitchen. The measuring cup comes in handy for frosting, glazing, dressing salads, and gravy pouring services.
Cooking tutorials and chefs emphasize the actual taste is in many types of kitchen measuring tools. However, never lose your gut feeling when you are in the kitchen. Machines are artificial intelligence that can never beat your culinary competency.
6 in 1 Multi Can And Jar Opener- The 6 in 1 multi opener is probably the best can opener available in the market nowadays. It is a multifunctional tool that helps you open cans, bottles, jars, easily. With a non-slip design, the 6 in 1 multi can opener has been produced to protect your hands and reduce stress on your wrists. Whether you are at home or on a picnic, the multi opener will help you open cans and jars in a wide variety of applications. It has a pull hook used to pull open the iron pieces sealed in various cans and a handle that grips the tight lid for easy unscrewing.
The smooth edge can opener lets you open cans easily without any fuss. It’s designed with a non-sharp edge and oversized knob. The smooth edge helps you protect your fingers securely when opening cans. You can open all kinds of cans safely. Just turn the non-slip knob. Its ergonomic non-slip design allows you to create blunt, smooth edges without hand slipping.
Swing-A-Way Portable Can Opener-
The swing-a-way portable can opener has a stainless steel sharp metal blade. It's designed with a comfortable and anti-slip ergonomic knob. The swing-a-wa can opener helps you open cans by twisting a knob. You are able to slice through the circumference of the lid.
In order to open the can, turn the non-slip knob and the edge will open the can easily.
Having a travel-friendly can opener can be a very useful tool when you're camping or even on a rental vacation. When you’re carrying with you food for a trip, you don’t want to take with you kitchen tools that take a lot of space. A camping can opener is a tiny lightweight tool that can squeeze into your bag easily.
One touch can opener
The one touch can opener is the easiest way to open cans, jars and bottles effortlessly. It’s an electric battery-operated can opener that requires 2 AA batteries. It's designed with a one-button operating system that is easy enough for nearly any cook to use. All you need to do is just place it on the can, touch the button and away it goes. The one touch can openers is a perfect solution for people with arthritic hands.
Features
It’s important to check that the features of the can opener are suitable for your needs. For example, soft grips and larger handles might help people with limited dexterity and arthritis turn the can opener easier.
Size
A can opener is a useful tool in any kitchen and for that reason you should consider placing it in an accessible place. Most manual can openers are small enough to fit in a basic utensil drawer, making it simple to store. On the other hand, electric can openers are much larger, so you should make sure you have enough cabinet or counter space to hold them in your kitchen. If you’re going to use your can opener also on camping and travels, we highly suggest buying a manual can opener as they are more compact and easy to carry.
Safety
Those of you that open cans oftenly probably know that opening cans can be dangerous for your hands. Today there are types of can openers that are designed to save your hands from cutting your hand when you lift the edge of a metal lid. You should look for safety if you suffer from arthritis or get your children to help you in the kitchen.
Durability
When using a can opener regularly in daily use, it is really important to buy a can opener that will last for a long term and be made from durable materials. You don't want to keep replacing it year after year. You should also consider buying a can opener that has a cutting edge made from stainless. No one wants a rusty can opener.